
If your kitchen sink looks fine from across the room but smells off when you lean in, you're probably dealing with more than soap film. How to clean kitchen sink the right way matters in Palm Beach County, where humidity, sand, and fast kitchen turnovers make sinks turn into problem spots fast, especially in move-out kitchens, pet homes, and Airbnb prep.
Table of Contents
- Why Your Kitchen Sink Needs More Attention Than You Think
- The Universal Cleaning Sequence That Works on Any Sink
- How to Clean Stainless Steel, Porcelain, and Composite Sinks
- Removing Limescale, Stains, and Garbage Disposal Odors
- The Hidden Hygiene Zones Around the Sink
- A Simple Weekly and Monthly Maintenance Rhythm
- When to Call a Professional Deep Cleaning Service
Why Your Kitchen Sink Needs More Attention Than You Think
A homeowner usually notices the sink at the worst possible moment, after dinner dishes are done and the basin still does not look clean. The kitchen sink is not just a shiny fixture, it is a contamination point. USDA research found it was the most often contaminated surface after a breakfast-prep task involving raw sausage, shell eggs, and cut cantaloupe, with 34% of sinks testing positive and 26% of cantaloupe samples contaminated after preparation. That is why the sink can carry cross-contamination risk in a way a countertop usually does not, especially when raw meat and produce share the same prep area. USDA research summary on kitchen sink food safety

Why a quick rinse doesn't count
A lot of homeowners think hot water and a swipe with the sponge are enough. They are not, because visible clean and food-safe clean are two different things, and sink hygiene has to handle moisture, residue, and repeated contact all day long. Consumer Reports sink hygiene guidance says a disinfecting cleanser should go on the sides and bottom of a kitchen sink once or twice a week, and cleaning and sanitizing should happen every time the sink is used for food prep.
The working rule is simple. If the sink has touched raw chicken plates, produce scraps, pet bowls, or dirty prep water, it needs more than a rinse. That is why a shiny basin can still be the dirtiest thing in the room.
Practical rule: if food touched the sink, treat the sink like food-contact equipment, not just plumbing.
South Florida homes make this harder. High humidity keeps residue damp longer, and that gives grime more time to stick around between cleanings, especially in kitchens that do not get a full reset every day. In a lot of houses, I also see the problem spread beyond the basin, because the faucet base, drain rim, soap dispenser, and the counter edge collect splashes that never get wiped out. Those overlooked zones matter just as much as the bowl itself, and if the finish is already stained, scratched, or holding odor after routine care, a deeper reset from a local Palm Beach County team is often the smarter move than forcing more scrubbing onto a surface that needs a different approach.
For homeowners using a routine that includes gentle scrubbing and a targeted cleaner, the method matters too. A simple vinegar and baking soda cleaning routine can help with buildup, but the material still sets the limits on what you should use and how hard you should work it.
The Universal Cleaning Sequence That Works on Any Sink
Before you worry about stainless steel, porcelain, or a composite finish, clear the sink completely. Remove dishes, strainers, sink mats, and anything else that blocks the basin, because those items trap residue and hide grime where you can't reach it. In real homes, that one step makes the rest of the job easier and keeps you from scrubbing around the clutter.
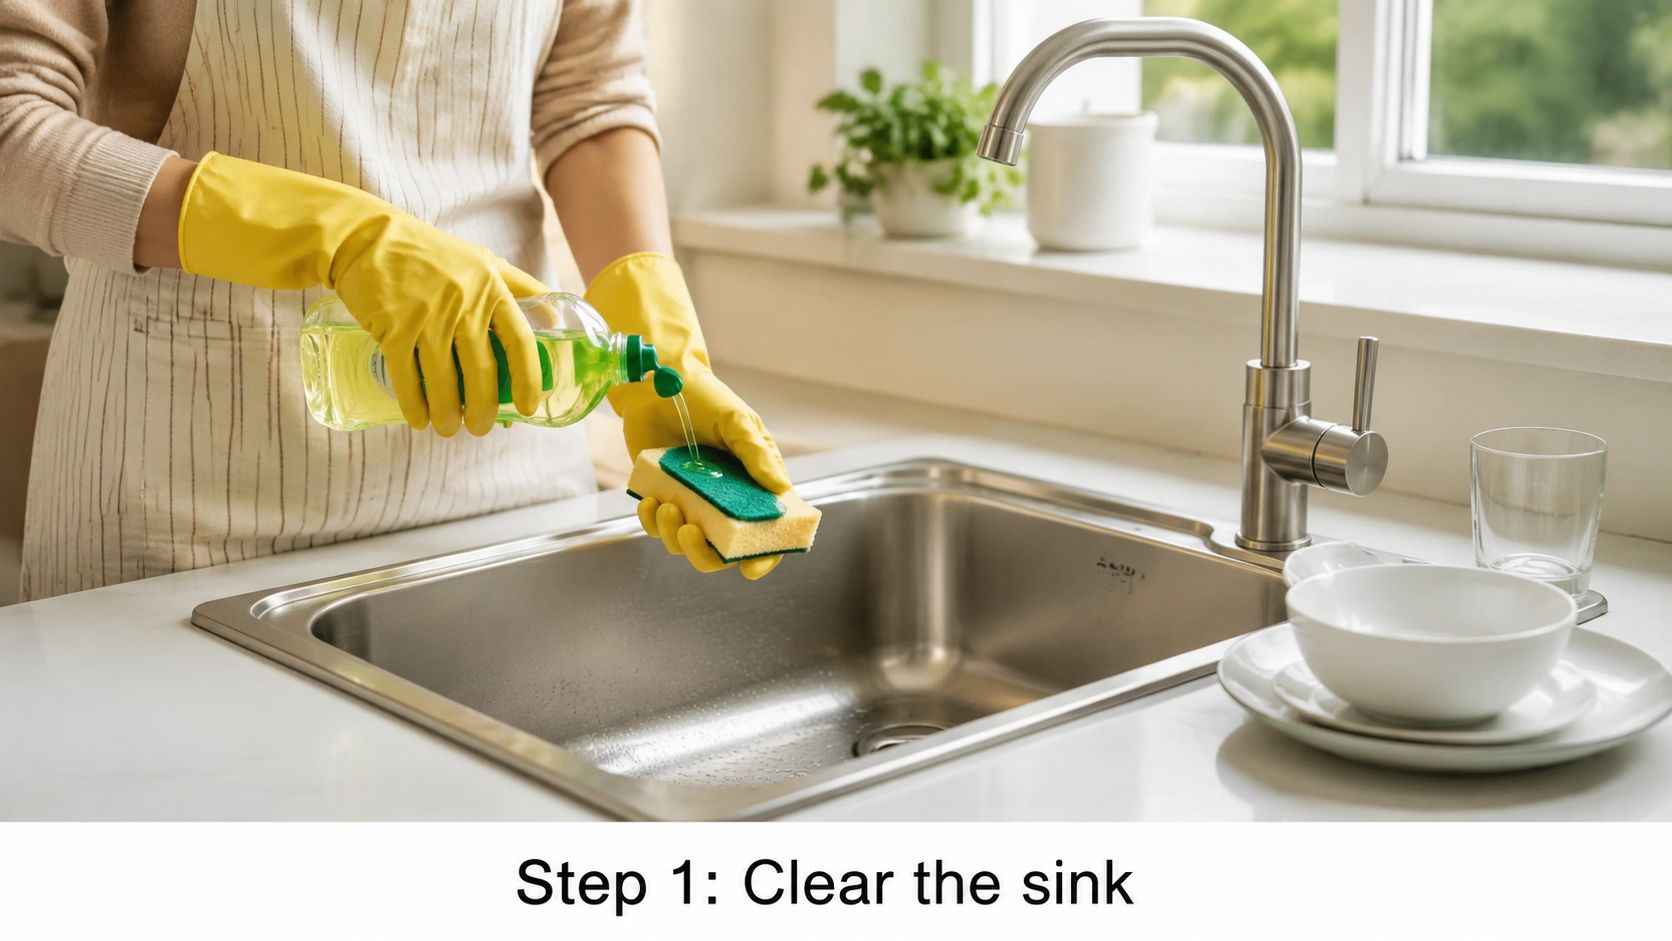
Start with soap, not abrasives
A good default sequence is: degrease, scrub, rinse, sanitize if needed, then dry. Use dish soap and a non-abrasive sponge first if the sink feels greasy, because soap cuts through the film without scratching the finish. For brushed stainless, scrub in the direction of the grain so you're cleaning the metal instead of scuffing it. A step-by-step guide from Branch Basics also recommends using a soft sponge for the basin and a small brush or toothbrush for the drain area and faucet base. Branch Basics sink-cleaning method
A useful mental check is whether you're cleaning the whole basin or just the visible center. The edges, drain ring, and faucet foot collect more residue than you might expect, especially in homes where the sink gets used for meal prep all day. I see this in Palm Beach County kitchens after beach weekends, when sandy dishwater leaves a film that doesn't rinse away cleanly.
Don't skip the drying step
After rinsing, dry the sink. That's the part many people skip, and it's usually why the sink looks spotted again a few hours later. Real Homes notes that a final dry wipe with a soft towel or microfiber cloth helps avoid water spots and brings back the finish. Drying stainless steel sinks properly
A sink that air-dries with hard-water residue won't stay polished, even if the scrub was done well.
For a quick visual reset, this is also the point where a deeper kitchen service can make sense, especially if the rest of the room needs a reset too. Sunset Shine Home Cleaning's vinegar and baking soda cleaning guidance
How to Clean Stainless Steel, Porcelain, and Composite Sinks
The material matters because the wrong cleaner can damage the finish faster than grime does. A stainless sink can tolerate one style of treatment, while a porcelain or composite sink needs a gentler hand, and that's where many DIY guides go wrong. The safer move is to match the cleaner to the basin, not to the internet's favorite shortcut.
Stainless steel needs a short, controlled reaction
For stainless steel, a common non-abrasive method is to sprinkle baking soda on a damp sink, scrub gently, then spray with vinegar and rinse after the fizzing stops. The point is the short fizz, not a soak. The same source warns against leaving vinegar on stainless for long periods, which is why you rinse right away and then dry the sink well. Stainless steel sink cleaning method
That rule matters in homes near the coast, where salt air and mineral spotting can already dull the look of the basin. If the finish is brushed, clean with the grain and keep the pad soft. For scratches or dull patches, a separate polish or restoration step may be needed before you go back to your normal routine. Stainless steel sink scratch care
Porcelain and composite need less acid, less abrasion
Porcelain, enameled cast iron, and many composite sinks usually do better with mild dish soap and warm water. OXO's material guidance points that way for more delicate surfaces like copper and enameled cast iron, and warns that vinegar isn't right for every finish. OXO sink material cleaning guidance
Composite granite is where homeowners often overdo it. Skip abrasive powders and harsh bleach unless the manufacturer says they're safe, because those products can dull the surface or change the sheen. In practice, a soft cloth, dish soap, and careful rinsing get you farther than aggressive scrubbing.
Best decision rule: if you're not sure the sink finish can take acid or abrasion, start with mild soap and warm water.
That's the same advice I'd give a renter in Boca Raton or a property manager turning over an apartment in West Palm Beach. If the sink finish looks delicate, protect the finish first and chase the stain second.
Removing Limescale, Stains, and Garbage Disposal Odors
Some sink problems don't budge with the universal scrub. Hard-water rings, old tea marks, and disposal smells need targeted treatment, and those fixes work best when you don't force them all with the same product. The trick is to match the problem to the least aggressive method that still works.
Treat the stain, not the whole sink
Limescale usually shows up as a pale ring around the bowl or a chalky edge near the drain. A short baking soda paste can help loosen it, and on safe finishes a diluted vinegar treatment can break mineral buildup before you rinse and dry. The key is not to leave moisture sitting there, because water spots can come right back after the cleanup is done. For a deeper hard-water reset, use a method that's appropriate to the surface instead of scrubbing harder. Hard-water stain removal for sinks
Coffee, tea, and rust marks need the same kind of restraint. Gentle stain lifting beats aggressive abrasion, especially on porcelain and composite sinks that show dull patches once the finish gets scuffed. In older Palm Beach County homes, I often see this after guests use the sink for coffee filters or after a small rust drip from metal tools sits too long.
Freshen the disposal the safe way
Disposal odors usually come from buildup on the splash guard, blades, or hidden edges, not from the air itself. A practical route is baking soda and ice to help scrub the chamber, then a citrus peel run for a fresher smell. If you're reaching near the disposal opening, cut the breaker first and don't put your hand inside the unit. The earlier sink-gasket note from household cleaners matches what I see in real kitchens, grime hangs onto the rubber edges long after the basin looks finished.
For a service like Sunset Shine Home Cleaning, this is the kind of kitchen detail that gets folded into a broader reset when the client needs the whole prep zone brought back to neutral. The sink smells less like last week's cooking, and more like the room is ready again.
The Hidden Hygiene Zones Around the Sink
A clean-looking basin can still hold grime in the places hands skip. The drain rim, faucet base, seams, overflow opening, and garbage-disposal splash guard collect buildup fast, which is why how to clean kitchen sink care has to include the parts around the bowl, not just the bowl itself. Consumer-facing cleaning guides point to the same overlooked spots, and they are right to do so. Trouble usually sits where water splashes, dries, and leaves residue behind.
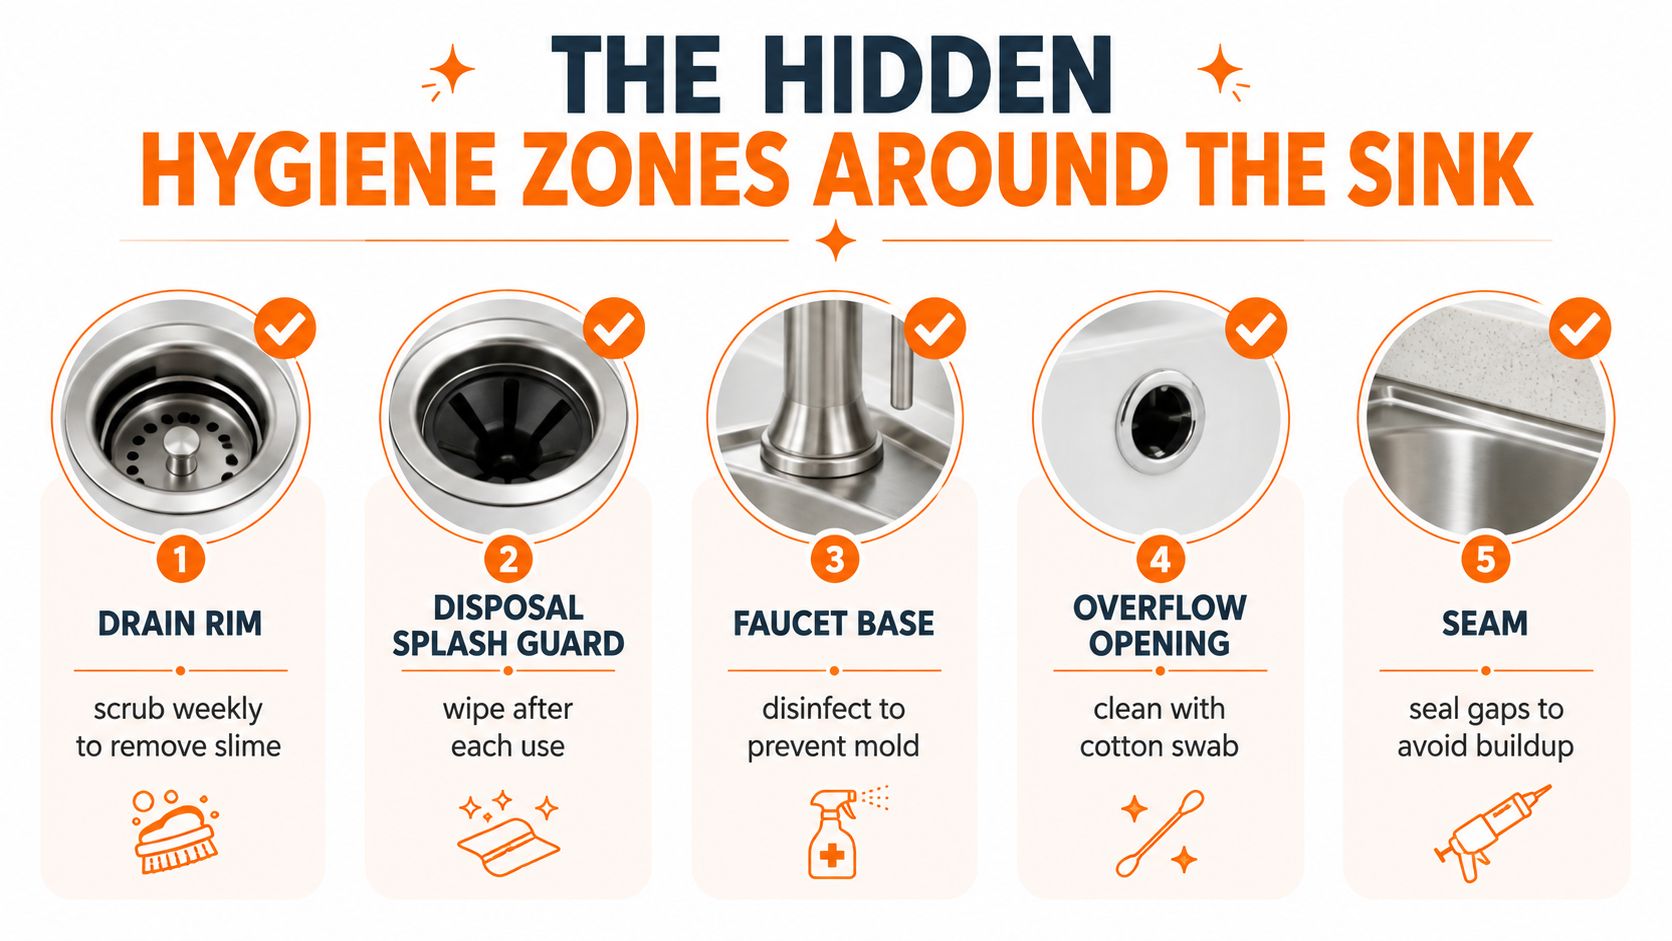
The small tools that make the difference
An old toothbrush, a thin bottlebrush, and a small detail brush do more work here than a big sponge ever will. The drain rim needs scrubbing where moisture lingers. The faucet base often needs its own wipe-down because splashback leaves a film there, and the overflow opening can hold residue that keeps a sour smell alive even after the basin looks polished.
The mistake I see most often is stopping as soon as the visible sink looks bright. In South Florida homes, that usually means the hidden edges stay damp, and damp edges collect soap film, grease, and mineral residue again before the day is over. On stainless steel, use a lighter touch so you do not leave scratch marks. On porcelain, watch for abrasive tools that can dull the glaze. On composite sinks, avoid harsh scouring that can rough up the finish and make future cleanup harder. Material choice matters because the wrong tool can fix one spot and damage another.
Good Housekeeping's sink-cleaning guidance also points out that plugholes and overflows trap dirt, and it recommends a thin bottlebrush for weekly scrubbing, with washing soda and boiling water used carefully where the drainage setup allows it. Good Housekeeping sink and overflow care The point is simple. A basin can shine while the drain line and overflow still smell off.
If the basin shines but the drain smells, the sink still isn't clean.
That is the part guests notice first in a rental, and it is also the part homeowners often stop noticing after living with it too long. When a sink has staining around the seams, sticky residue under the faucet, or a splash guard that keeps holding odor after a proper scrub, a deeper reset from a local Palm Beach County team is often the smarter call than chasing the same spots over and over.
A Simple Weekly and Monthly Maintenance Rhythm
The easiest sink routine is the one you'll repeat. Weekly care should be short, which means clearing the basin, doing the soap-and-sponge scrub, hitting the drain rim and faucet base, then drying the whole surface. That keeps the finish from going cloudy and stops residue from building into a bigger job later.
A rhythm that fits a busy home
Monthly, give the sink a deeper reset with the baking soda and vinegar method if the material allows it, then detail the hidden zones with a brush. If you use the disposal often, freshen it the same day so odors don't settle in. Seasonal upkeep can include descaling, checking the caulk seam where the sink meets the counter, and making sure the cleaner in your cabinet still matches the sink material.
- Weekly: clear, scrub, rinse, dry.
- Monthly: detail the drain, faucet base, and disposal area.
- Seasonally: inspect seams and adjust products for the basin finish.
That schedule works better than random deep scrubs because it keeps the job small. A sink that's maintained on a steady rhythm doesn't fight back as hard, which matters in Palm Beach County homes where humidity can make buildup feel like it comes back overnight.
When to Call a Professional Deep Cleaning Service
A deep cleaning service makes sense when the sink is part of a bigger reset you don't have time to finish well. That happens after renovation dust settles into the basin, during Airbnb turnovers with tight checkout windows, and in move-out cleans where landlords check kitchens, bathrooms, floors, and baseboards side by side. It also makes sense when you've fallen behind and need a clean start before moving to maintenance cleaning.
Why a pro visit can be the smarter move
A trained team brings the right tools for the finish, the hidden sink zones, and the surrounding kitchen surfaces. For move-outs, that often means the sink gets cleaned with the cabinet fronts, counters, backsplash area, and baseboards, so the room looks finished instead of partly handled. In humid Palm Beach County homes, that level of detail matters because residue, mildew, and coastal film can show up in corners that look fine at first glance.
If you need the kitchen reset without guessing which product is safe on which surface, a local deep clean is the practical option. It's faster than trial-and-error, and it keeps you from damaging a finish right before a walkthrough or guest arrival.
Sunset Shine Home Cleaning handles kitchen sink cleaning as part of deep clean, move-in/move-out, and recurring service for homes across West Palm Beach and Palm Beach County. If your sink needs a proper reset, visit Sunset Shine Home Cleaning, or call 561-408-4020 to book a cleaning that fits your schedule.