
You're standing in a humid South Florida kitchen, scrubbing a sticky door above the range while grease spreads into the grain. Choosing a degreaser for wood cabinets starts with identifying the finish: sealed oak, painted shaker doors, laminate, thermofoil, or older varnish can each respond differently to the same spray.
For homeowners, renters, Airbnb hosts, and property managers, the target is a guest-ready kitchen without dull patches, swollen edges, or repainting before a landlord walkthrough. Palm Beach County's humidity, cooking residue, AC dust, and salty coastal air make buildup cling quickly, so use a controlled method and match the cleaner to the surface. A mild approach may suit sealed wood, while laminate can tolerate different products. Painted, thermofoil, and aged varnished finishes demand more caution.
Table of Contents
- Why the Wrong Degreaser Ruins Wood Cabinets
- Identify Your Cabinet Finish Before You Choose a Cleaner
- Safe Degreasers and DIY Recipes Compared
- Step-by-Step Degreasing Technique That Protects the Finish
- A Real Kitchen in West Palm Beach and What the Routine Looks Like
- Four Mistakes That Strip Finish and How to Avoid Them
- Maintenance Schedule and When to Call a Pro
Why the Wrong Degreaser Ruins Wood Cabinets
A harsh degreaser can strip a protective coating faster than it lifts grease, especially in Palm Beach County kitchens where humidity keeps residue soft and sticky. The right degreaser for wood cabinets depends on the finish, the amount of buildup, and how long the product remains wet. Guidance from Southern Living on cleaning wood cabinets recommends mild dish soap, warm water, a damp cloth, immediate rinsing, and thorough drying, while warning against ammonia, bleach, and TSP.
Palm Beach County homes often combine several cabinet materials. A 1970s West Palm Beach ranch may have sealed oak lowers and painted uppers, while a coastal condo may use laminate or thermofoil around the range. A cleaner that brightens a laminate hood can cloud satin polyurethane, soften painted surfaces, or loosen an older varnish at the edges.
The finish changes the risk
- Sealed wood: Usually tolerates mild soap with minimal moisture, followed by rinsing and drying.
- Painted wood or MDF: Needs low-abrasion cleaning. Scrubbing can flatten the sheen or wear through paint, particularly on raised edges and frequently handled doors.
- Laminate: Tolerates stronger chemistry, but abrasive pads can scratch it, and excess heat can affect bonded surfaces.
- Thermofoil or older varnish: Requires testing first. Aged coatings may already be brittle, cloudy, or separating near seams.
Practical rule: If the finish is uncertain, dilute dish soap, test a hidden area, and use the least moisture that removes the grease.
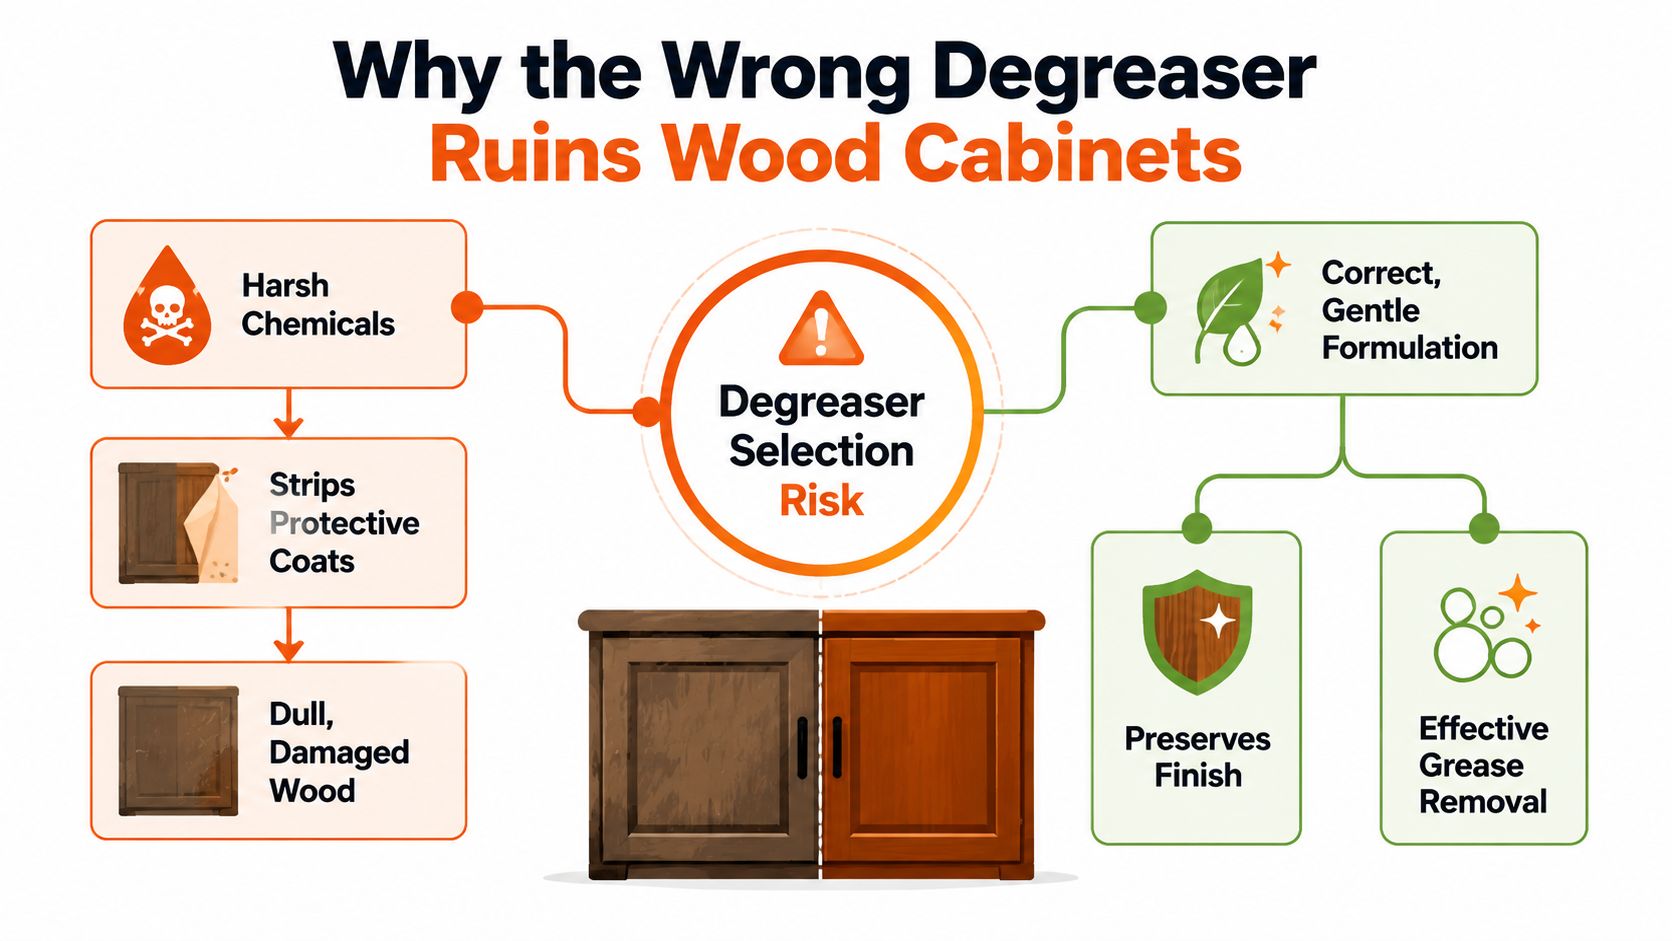
Control the process: identify the surface, choose a compatible cleaner, limit dwell time, rinse away residue, and dry the joints. Leftover alkalinity can haze finishes or affect sensitive coatings, so neutralizing residue matters, as described in this controlled cabinet degreasing guide.
Identify Your Cabinet Finish Before You Choose a Cleaner
A degreaser that works on one Palm Beach County kitchen can dull another. Test inside a door, beneath a lower edge, or beside a hinge before cleaning the visible face. This small check shows whether the surface can tolerate moisture and chemistry.
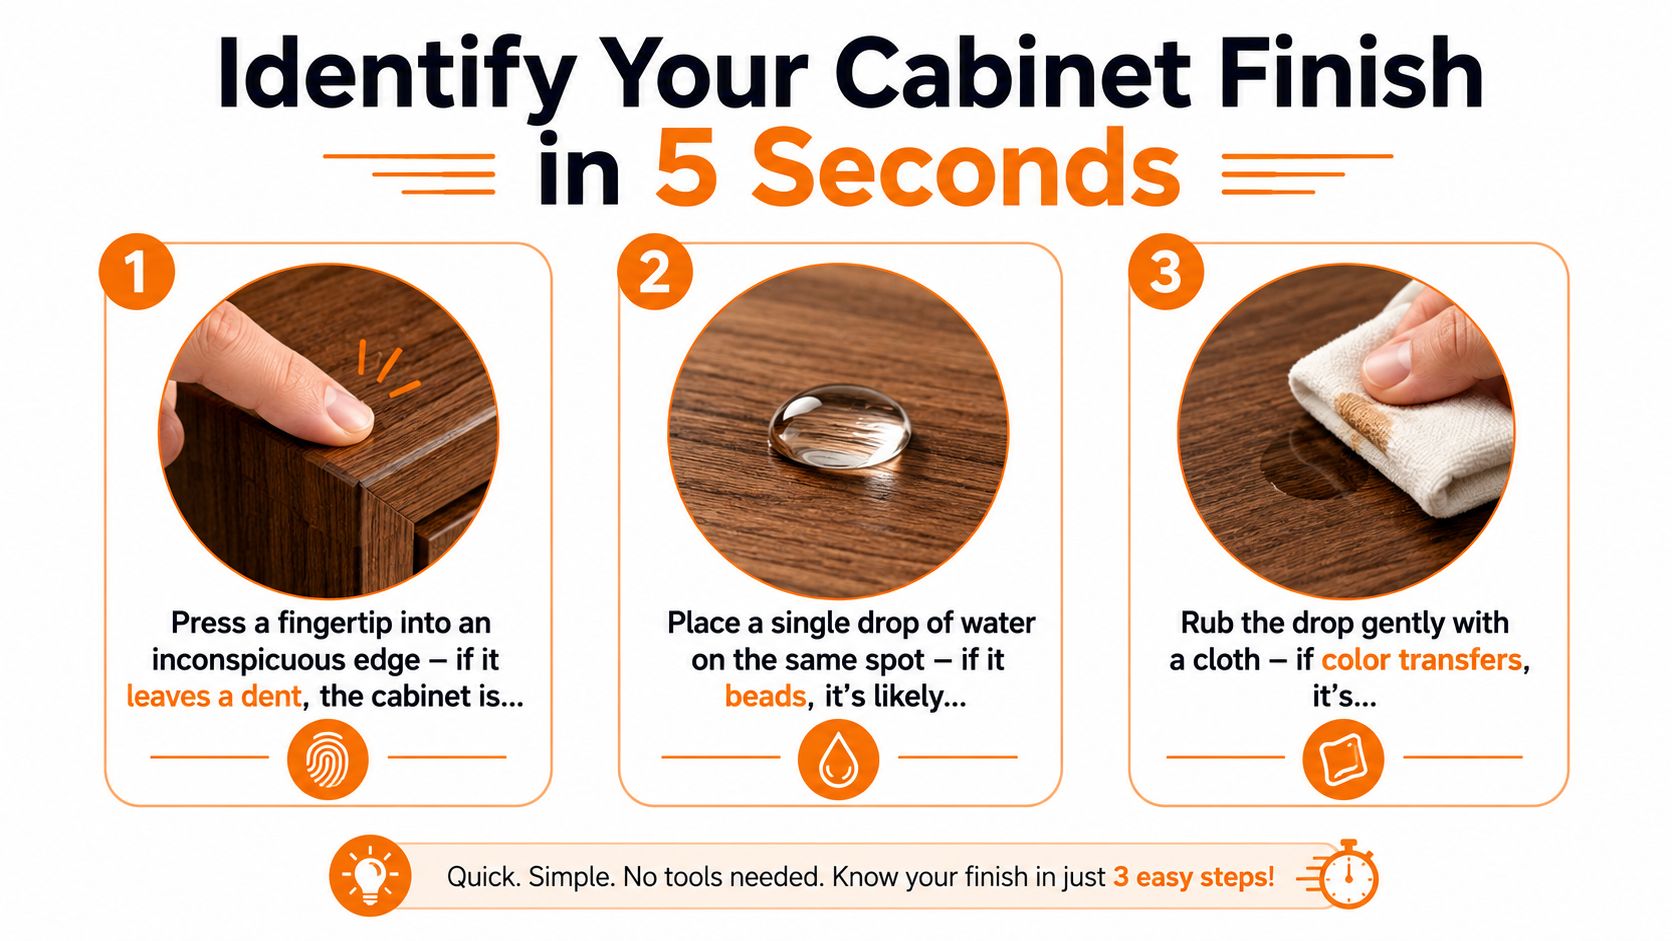
A quick hidden-corner test
- Press lightly with a fingertip. A dent or soft feel suggests unsealed, worn, or older varnished wood. Use only a barely damp microfiber cloth, and stop if the wood darkens.
- Place a couple of water droplets on the spot. Beading usually indicates sealed wood, polyurethane, conversion varnish, or factory lacquer. Water that absorbs quickly suggests compromised protection, so stay with mild cleaning.
- Check the visual pattern. Uniform color often indicates painted MDF or painted hardwood. Visible grain beneath the sheen points to stained and sealed wood.
- Tap gently. A hollow plastic sound may indicate laminate or thermofoil, although cabinet construction varies.
- Rub carefully with a clean damp cloth. Color transfer means the coating may be failing or the surface may be poorly sealed. Stop testing.
Finish determines the cleaning risk. Sealed wood generally handles diluted soap and limited moisture. Painted wood or MDF needs low-abrasion contact, especially along raised edges. Laminate may tolerate stronger chemistry, but abrasive pads can scratch it. Thermofoil or older varnish deserves extra caution around seams and brittle areas.
If the finish is peeling or chalky, cleaning will not restore it. Homeowners planning a color change can review this practical kitchen cupboard repaint advice before combining cleaning and painting work.
For worn varnish, read this guide to removing varnish from wood before attempting removal. A cabinet with failed protection needs restoration before a regular degreasing routine can proceed.
Safe Degreasers and DIY Recipes Compared
In humid kitchens, mild dish soap is the safest starting point for most surface grease. Use a solution of 100 parts water to 1 part liquid dish soap, or roughly one teaspoon per 100 ml of warm water for a small household batch. Apply it with a soft, damp cloth, use less liquid on delicate finishes, and dry the surface promptly.
| Degreaser | Mix ratio | Safe finishes | Avoid on |
|---|---|---|---|
| Mild dish soap | One teaspoon per 100 ml warm water | Sealed wood, painted surfaces, laminate, thermofoil, after testing | Worn or raw wood if it darkens |
| White vinegar | 1:1 with water | Some sealed wood and laminate, only after testing | Sensitive painted, thermofoil, older, or varnished finishes |
| Castile soap | One tablespoon per 250 ml water | Painted finishes and sealed wood when well diluted | Surfaces where residue can remain |
| Baking soda paste | Two parts baking soda to one part water | Spot treatment on sturdy sealed surfaces | Painted, matte, satin, delicate, or easily scratched finishes |
| Commercial wood-safe cleaner | Follow product label | Compatible sealed wood, painted, or laminate surfaces after testing | Any finish the label excludes |
Use a short dwell time with household mixtures. Wipe the solution away within 60 seconds, then rinse with a clean damp cloth and dry fully. Diluted vinegar can help with stubborn residue, but acidity and extra moisture may harm painted MDF, thermofoil, or older varnish. Test it only on a concealed area, and reserve it for finishes that tolerate it.
Finish condition matters as much as finish type. Sealed wood usually tolerates diluted soap or a labeled wood cleaner. Painted surfaces need low abrasion, especially on edges and satin or matte coatings. Laminate can handle routine soap cleaning, but gritty pastes may scratch it. Thermofoil needs minimal moisture around seams, while older or varnished cabinets may soften, haze, or lose color if the coating is already failing.
Skip ammonia, chlorine bleach, TSP, and acetone or nail polish remover. They can discolor, soften, strip, or dissolve cabinet coatings. Baking soda also carries enough grit to dull painted doors.
For sealed oak, choose diluted dish soap or a labeled wood cleaner. For a painted shaker kitchen, use diluted dish soap or carefully tested castile soap. For thermofoil in a rental kitchen, start with a barely damp cloth and mild soap. More tested household formulas appear in this guide to natural cleaning product recipes. If grease remains after gentle treatment, the finish may need professional assessment rather than a stronger chemical.
Step-by-Step Degreasing Technique That Protects the Finish
The safest method depends on the finish and the soil. A sealed wood door can tolerate more moisture than painted MDF, while laminate and thermofoil need controlled wiping around edges and seams. Work in small areas so the cleaner never dries on the surface.
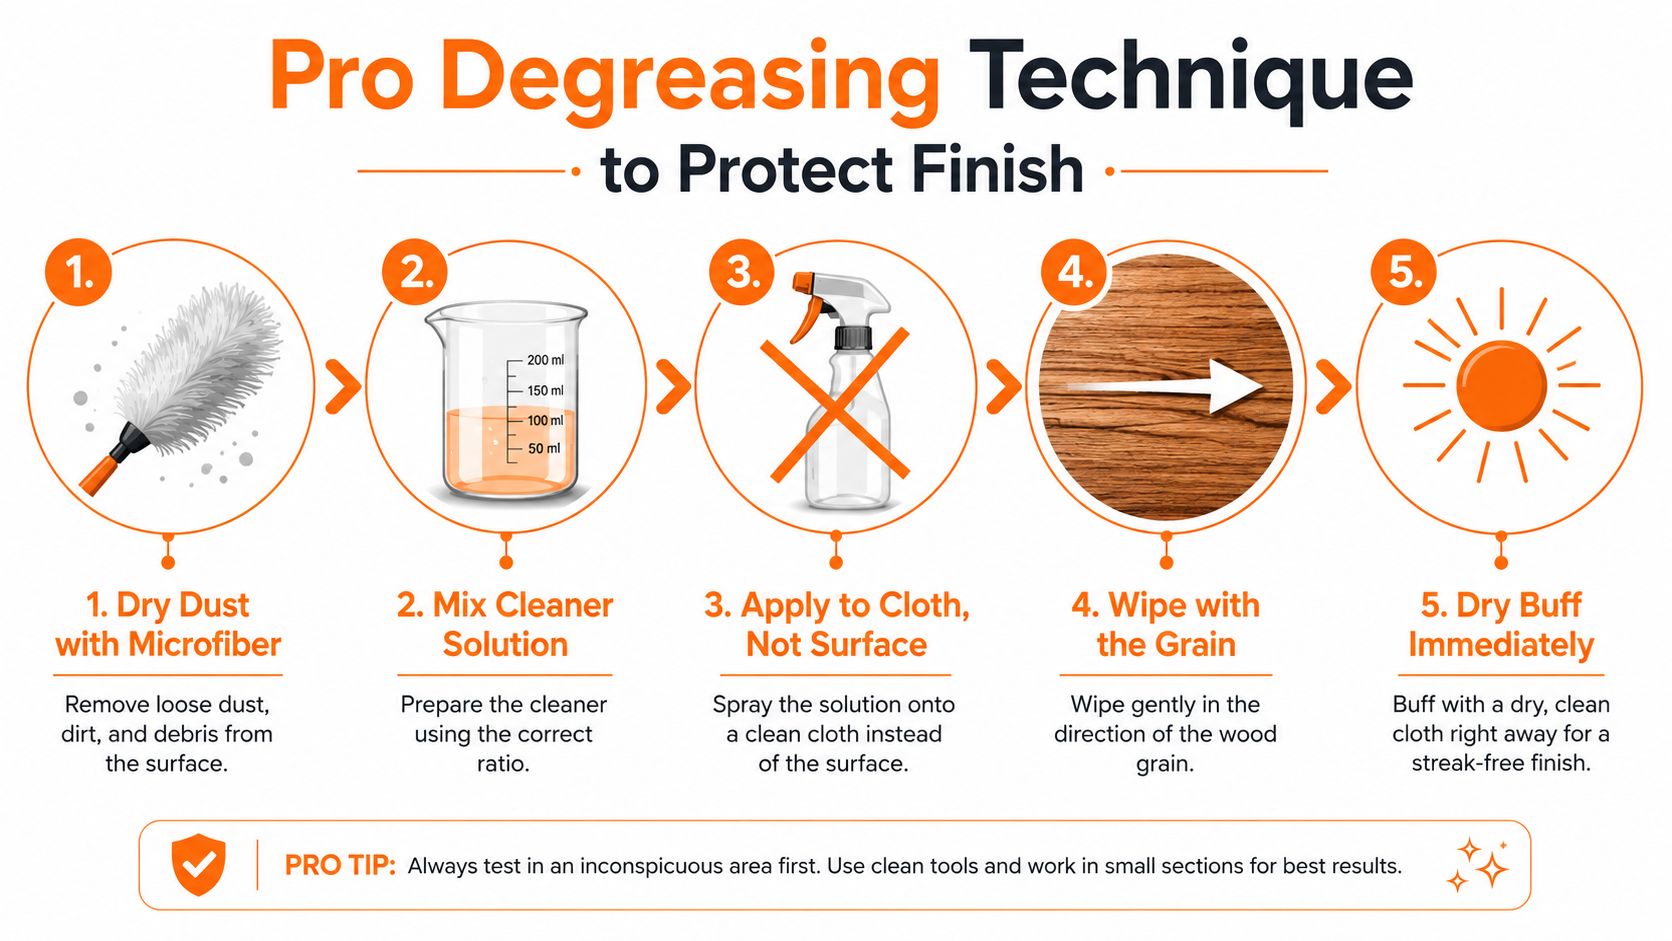
Follow the professional sequence
Dry-dust first. Wipe door faces, top edges, trim, and pulls with a clean microfiber cloth. Crumbs and AC dust become gritty paste once they meet moisture.
Mix for the finish. For routine cleaning, use about one teaspoon of dish soap per two cups of warm water. A 50/50 vinegar-water mix belongs only on tested, sealed wood. Painted, laminate, thermofoil, and older or varnished cabinets should start with the milder soap solution. Apply it to the cloth, not directly to the cabinet.
Load the cloth, not the cabinet. Dip a microfiber cloth and wring it until damp, not wet. Clean 12-inch sections, following the grain on wood and using light pressure. On painted surfaces, laminate, and thermofoil, keep the cloth controlled rather than forcing moisture into seams.
Give grease brief dwell time. Above a range, hold the damp cloth against the buildup for 30 to 60 seconds, then wipe with a second clean microfiber. Short contact loosens cooking film without leaving the finish saturated. Older or varnished cabinets deserve the shorter end of that range, especially if the coating feels soft, hazy, or uneven.
Rinse and dry each section. Use a fresh damp cloth to remove cleaner residue, then buff immediately with a dry one. Pay close attention to hinge holes, seams, end panels, lower edges, and areas beside the sink or dishwasher. Residue can leave painted or sealed surfaces tacky in humid kitchens.
Finish the overlooked collection points. Clean the top edges of doors, the underside of the upper lip, toe-kicks, and pulls last. A soft nylon brush can loosen residue from grooves, but abrasive pads and melamine sponges can dull paint, laminate, and varnish. Wipe with the grain on stained oak to avoid uneven moisture lines.
If the cabinets will be repainted, degreasing is only the first preparation step. Review this cabinet painting prep guide before sanding or applying a new coating.
A Real Kitchen in West Palm Beach and What the Routine Looks Like
A galley kitchen in a 1978 West Palm Beach ranch shows why finish identification matters. The upper cabinets are painted off-white, while the lower doors are sealed oak. After two years of Magic Eraser use around the handles, the paint feels chalky near the knobs. That texture points to abrasion wearing the coating, not grease waiting for a stronger chemical.
Dry-dust the painted uppers first. Apply dish soap diluted to about one teaspoon per two cups of warm water to a wrung-out cloth, then work in 12-inch passes with the grain. Above the stove, cooking aerosol had formed a heavier film, so the cleaner stayed wet for a 45-second dwell in this kitchen. That longer contact time softened the concentrated buildup without requiring harder scrubbing. A clean damp cloth removed the residue, followed by a second rinse where surfactant remained.
The sealed oak lowers took a milder castile solution and careful edge buffing. Their inspection also found grease on each door's top edge and in the seam beside the microwave trim. Keep the cloth barely damp near joints, particularly in a humid Palm Beach County kitchen, where excess moisture can enter unfinished edges.
The cabinet-cleaning process guide is a useful reference for planning the work. Split-finish kitchens require separate testing and separate cloth control, even when the same degreaser appears suitable for both cabinet groups. Thermofoil, older varnish, laminate, and painted surfaces may each respond differently.
Four Mistakes That Strip Finish and How to Avoid Them
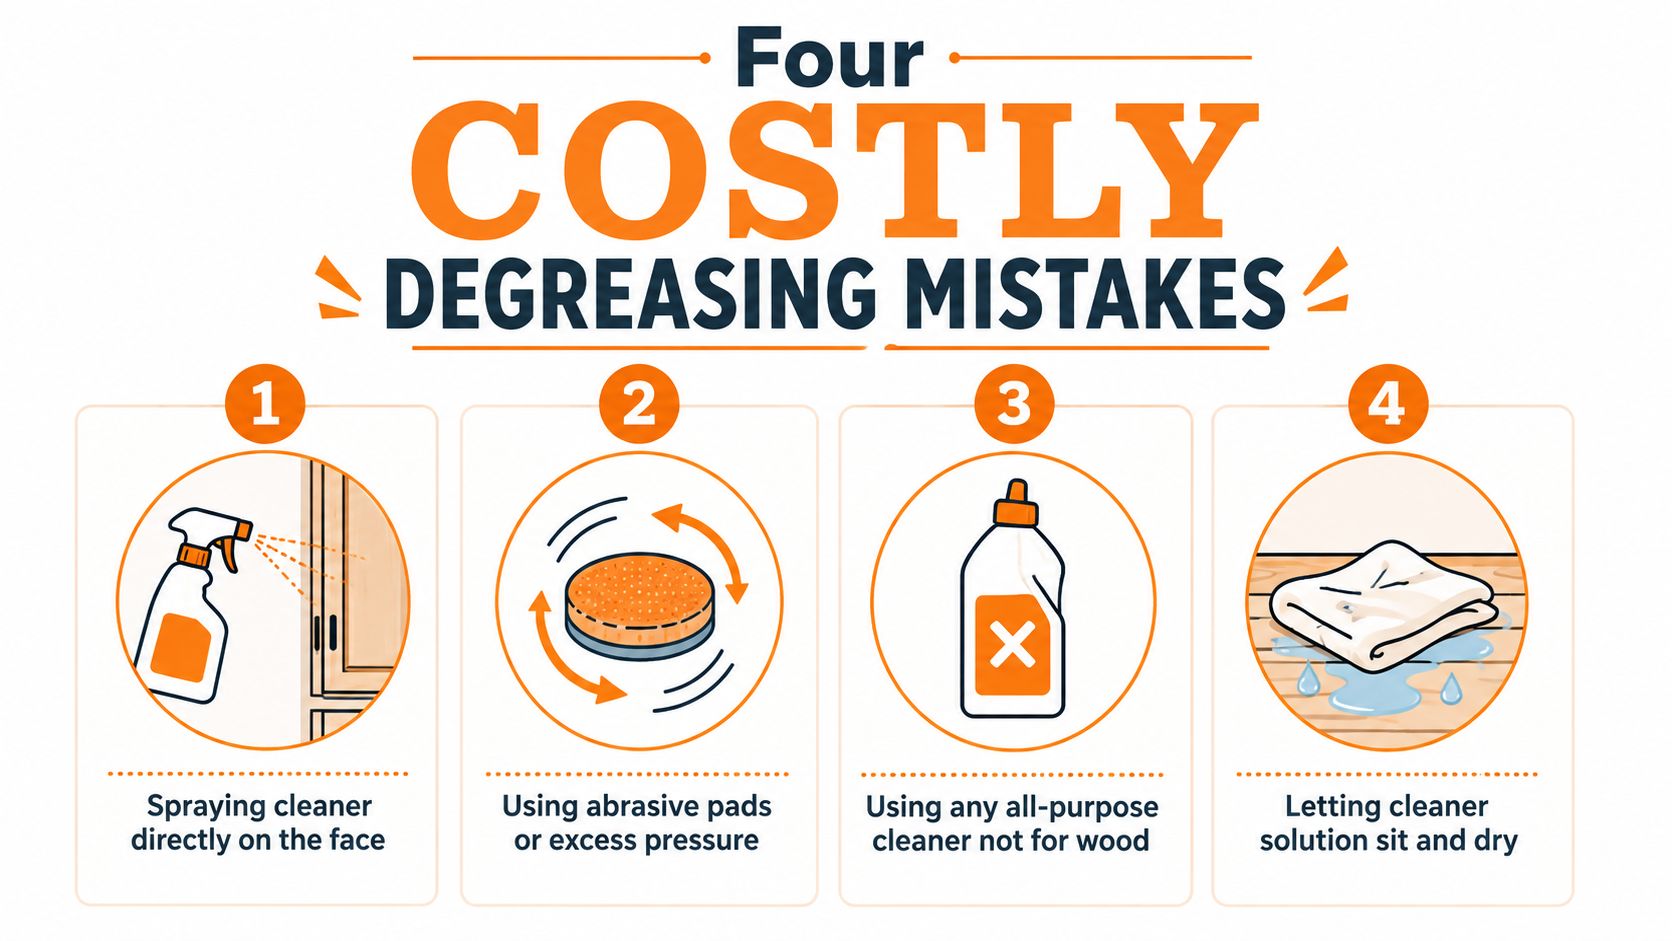
South Florida cabinets often suffer cleaning-related finish damage. Humidity and repeated moisture can make homeowners mistake this wear for “old wood,” especially on painted, varnished, or older cabinets.
- Spraying directly on the face: Liquid can run into hinge-side seams, unfinished edges, and joints. Spray diluted cleaner onto a microfiber cloth instead. Use the least moisture on older varnish and exposed wood edges.
- Using full-strength vinegar: Acid can dull painted MDF, thermofoil, and sensitive varnish. Start with mild soap. Reserve diluted vinegar for a tested, fully sealed finish, and avoid it on laminate seams or peeling coatings.
- Skipping the dry buff: Moisture left around hardware or joints can haze lacquer and varnish. Wipe with a fresh damp cloth, then dry immediately. Thermofoil and laminate edges need especially quick drying.
- Using abrasive scrubbers: Scotch-Brite pads, melamine sponges, and scrub-labeled products can flatten sheen or roughen paint. Use a soft nylon brush for grooves, with light pressure.
The wood cabinet care guidance from Anova Bois also recommends testing, low moisture, quick wiping, and caution with vinegar on wood. If a surface turns cloudy, sticky, swollen, or lighter, stop escalating the chemistry.
Maintenance Schedule and When to Call a Pro
A manageable routine prevents the range area from becoming a restoration problem.
- Weekly: Wipe splatter, handles, and visible cabinet film with diluted dish soap and a microfiber cloth.
- Monthly: Degrease the cabinet zone above the range and beside the handles, using short dwell time and immediate drying.
- Quarterly: Clean hinges, toe-kicks, cabinet tops, upper-door edges, and the area around the dishwasher and sink.
Call a refinisher or cabinet professional when you see cloudy whitening that won't buff out, peeling or flaking lacquer, swollen edges, or grease absorbed into raw wood. Humidity, cooking steam, and repeated moisture around sinks can accelerate each problem.
For an entire kitchen coated in buildup, a resale preparation, a move-out clean, or a tight Airbnb turnover, careful labor is often safer than reaching for a stronger bottle. The same applies after a rainy-season mess, post-hurricane cleanup, or a Palm Beach County property walkthrough where cabinets, floors, baseboards, and bathrooms all need attention at once.
Sunset Shine Home Cleaning handles kitchen degreasing as part of recurring, deep, move-in, move-out, Airbnb turnover, and property-management cleaning across West Palm Beach, Palm Beach Gardens, Jupiter, Juno Beach, North Palm Beach, Riviera Beach, Royal Palm Beach, Lake Worth, Boynton Beach, Delray Beach, Boca Raton, Wellington, Westlake, Loxahatchee, Loxahatchee Groves, and The Acreage. Visit Sunset Shine Home Cleaning, or call 561-408-4020 to schedule a careful cleaning that removes cabinet grease without treating a delicate finish like a countertop.