You notice it when the morning light hits the sink just right. Yesterday your stainless steel looked clean and even. Today there’s a fresh line near the drain, or a dull patch where a pan got dragged across the bottom. In West Palm Beach kitchens, that stands out fast. Bright sun through the window, hard water residue, and a little humidity can make every mark look louder than it really is.
That’s the frustrating part about stainless steel. It’s durable, practical, and still one of the most common kitchen sink materials around. But it isn’t scratch-proof. Everyday habits like scrubbing with the wrong pad, rubbing across the grain, or letting mineral buildup sit on the surface can turn a good-looking sink into one that always seems slightly dirty, even when it’s clean.
The good news is that most scratches can be improved, and many can be blended so well that they stop catching your eye. The trick is choosing the right method for the scratch you have, not the one you fear you have. A light surface scuff needs a very different approach than a groove your fingernail catches on.
Table of Contents
- That Sinking Feeling a Scratched Sink
- Assessing Scratch Severity Before You Begin
- Simple Fixes for Light Surface Scratches
- Repairing Medium to Deep Scratches Like a Pro
- The Final Polish and Blending Your Repair
- A Proactive Maintenance Plan for a Scratch-Free Sink
- Frequently Asked Questions About Sink Care
That Sinking Feeling a Scratched Sink
You finish wiping down the kitchen, step back, and the sink still looks tired. In a West Palm Beach kitchen, that happens fast. Strong sun, under-cabinet lighting, hard water spotting, and Florida humidity all make light scratches stand out more than they should.
That is why a scratched stainless sink bothers people so much. The rest of the room can be clean, polished, and ready for guests, but a scratched basin pulls your eye right to the wear. I see it all the time in Palm Beach County homes, especially vacation rentals and listings where every surface has to look sharp under bright light.
Stainless steel is still a smart sink material. It holds up well, cleans up well, and fits almost any kitchen style. But it also shows careless scrubbing, dragged cookware, and mineral buildup from our local water. Fine lines around the drain, dull wear on the bottom of the basin, and a few sharper marks from pans are the usual pattern.
The good news is simple. A lot of sink scratches look worse than they are.
Before you grab the harshest pad in the cabinet, slow down. The wrong fix can leave a bigger, duller patch than the original scratch, and that mistake is common in busy homes where people clean fast and scrub hard.
Here’s what usually causes more damage:
- Steel wool and rough scrubbers: They leave fresh scratches across the finish.
- Circular rubbing: It cuts across the grain and creates a cloudy, uneven area.
- Aggressive sanding right away: It can turn a small cosmetic mark into a repair that never blends properly.
A better approach is to match the method to the scratch, work with the grain, and check the finish in good light as you go. In South Florida homes, that extra care pays off because water spots and humidity already put the finish under a spotlight. If the sink gets heavy daily use, or it needs to stay guest-ready in a rental or listing, regular professional cleaning is less about appearance alone and more about protecting the surface from avoidable wear.
Assessing Scratch Severity Before You Begin
Before you try to remove scratches from stainless steel sink surfaces, stop and inspect the metal closely. Don’t rely on what the scratch looks like from across the room. Stainless steel can make a shallow mark look dramatic, especially in bright South Florida light.
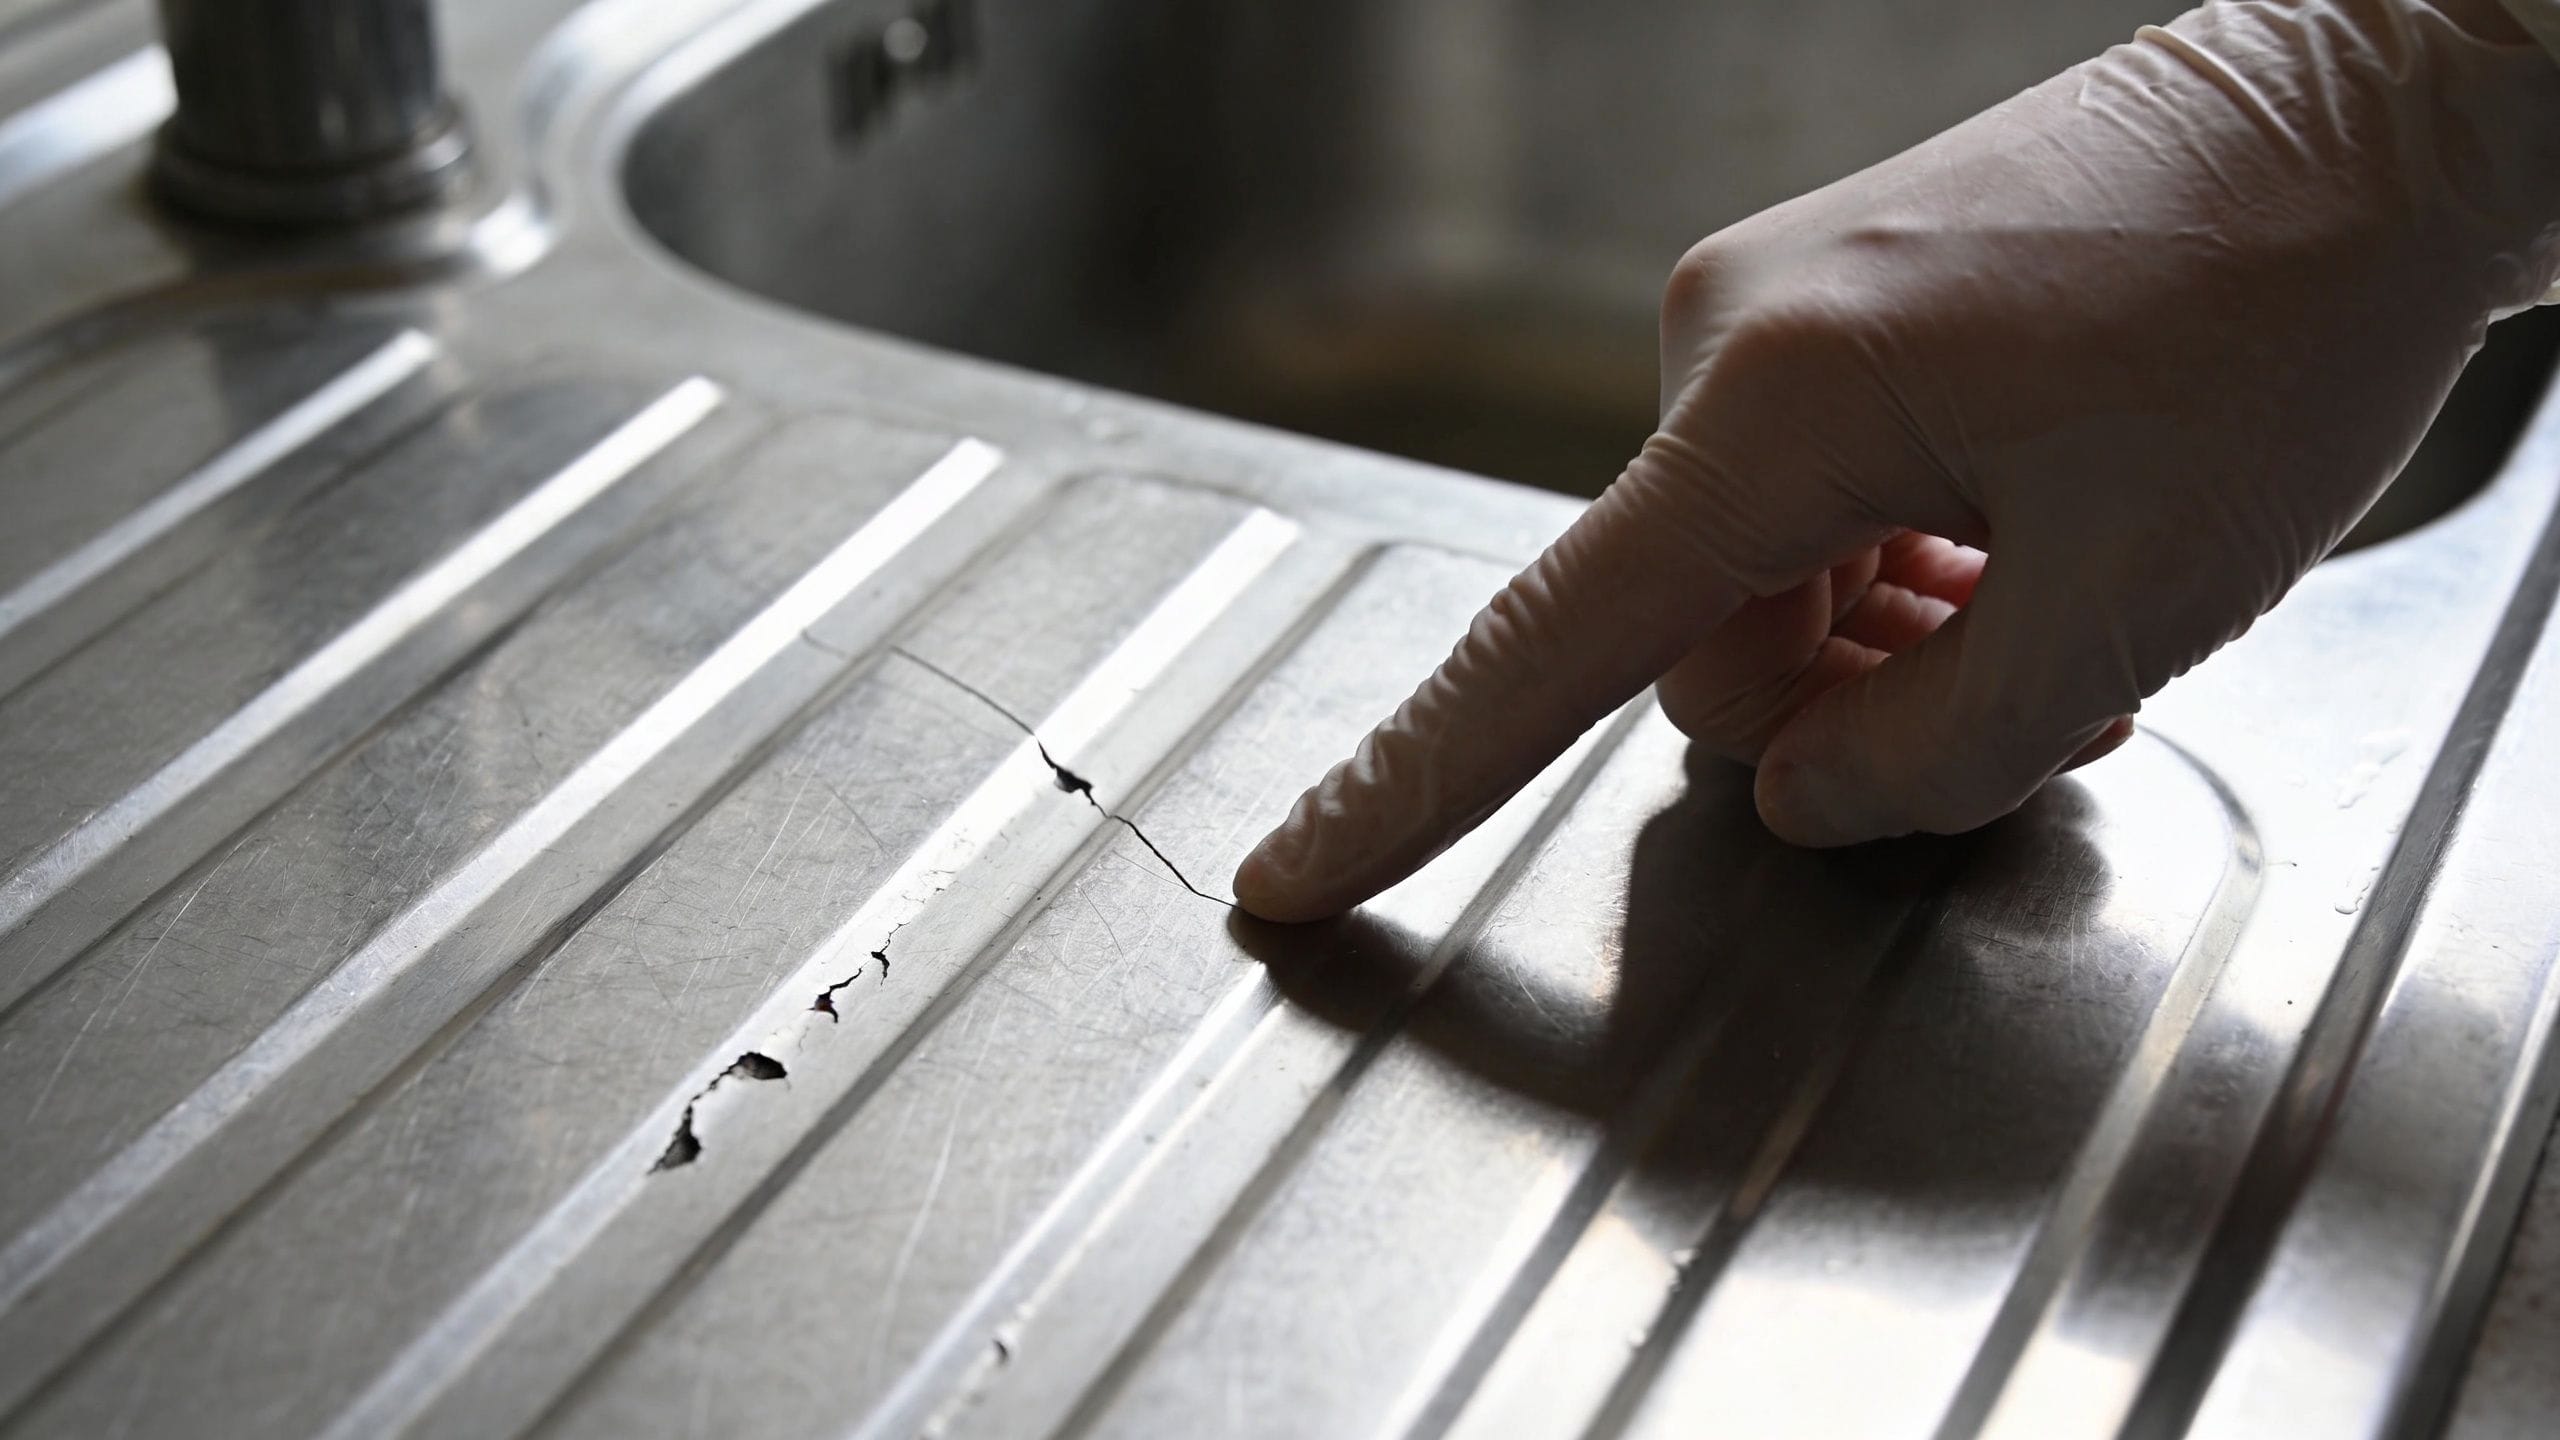
Use the fingernail test first
The easiest test is your fingernail. Clean and dry the sink first, then lightly drag your nail across the mark.
If your nail glides over it, you’re probably looking at a light surface scratch. These are the faint lines you mostly notice under direct light.
If your nail catches a little, that’s usually a medium scratch. It has some depth and needs more than a paste or polish.
If your nail gets stuck or the groove looks sharply cut into the metal, treat it as a deep scratch. That’s when a repair kit and controlled sanding become the safer path.
Work under side lighting if you can. A flashlight or strong window light will show the grain direction and help you tell a true scratch from mineral residue.
A quick decision guide
Use this before picking up any cleaner or abrasive:
| Scratch type | What it feels like | Best first move |
|---|---|---|
| Light scuff | Smooth to the touch | Clean, then try baking soda paste |
| Medium scratch | Nail catches slightly | Wet sanding with finer grits |
| Deep gouge | Nail sticks or groove is obvious | Repair kit with progressive grits |
A second detail matters just as much as depth. Look for the grain. Most stainless sinks have a brushed finish with faint linear lines from manufacturing. Your cloth, sanding pad, or polish should follow those lines in one direction. If you rub across them, you’ll make the repaired area stand out.
People often mistake hard water haze for scratching. In Boca Raton, Jupiter, and across Palm Beach County, mineral deposits can sit on the sink and exaggerate every flaw. Wipe the area clean first, dry it fully, and reassess before deciding the sink needs repair.
Simple Fixes for Light Surface Scratches
On a stainless sink with light wear, the first pass should stay controlled and low-risk. In Palm Beach County kitchens, especially in homes with hard water buildup, faint scratches often look worse than they are once mineral film is removed and the steel is fully dry.
Start with the gentlest method
A mild baking soda paste is usually the safest place to begin. It gives enough polishing action to soften shallow marks without stripping the finish or leaving a patchy spot that stands out under bright kitchen lighting.
You’ll need:
- Baking soda: Plain household baking soda works fine.
- Water: Use a small amount to make a paste.
- Microfiber cloth: Soft, clean, and lint-free.
- A dry towel: For rinsing residue and buffing dry.
Leave the green scrub pad under the sink. In my experience, that shortcut creates more follow-up work, especially on brushed stainless finishes common in newer Florida kitchens and short-term rentals.
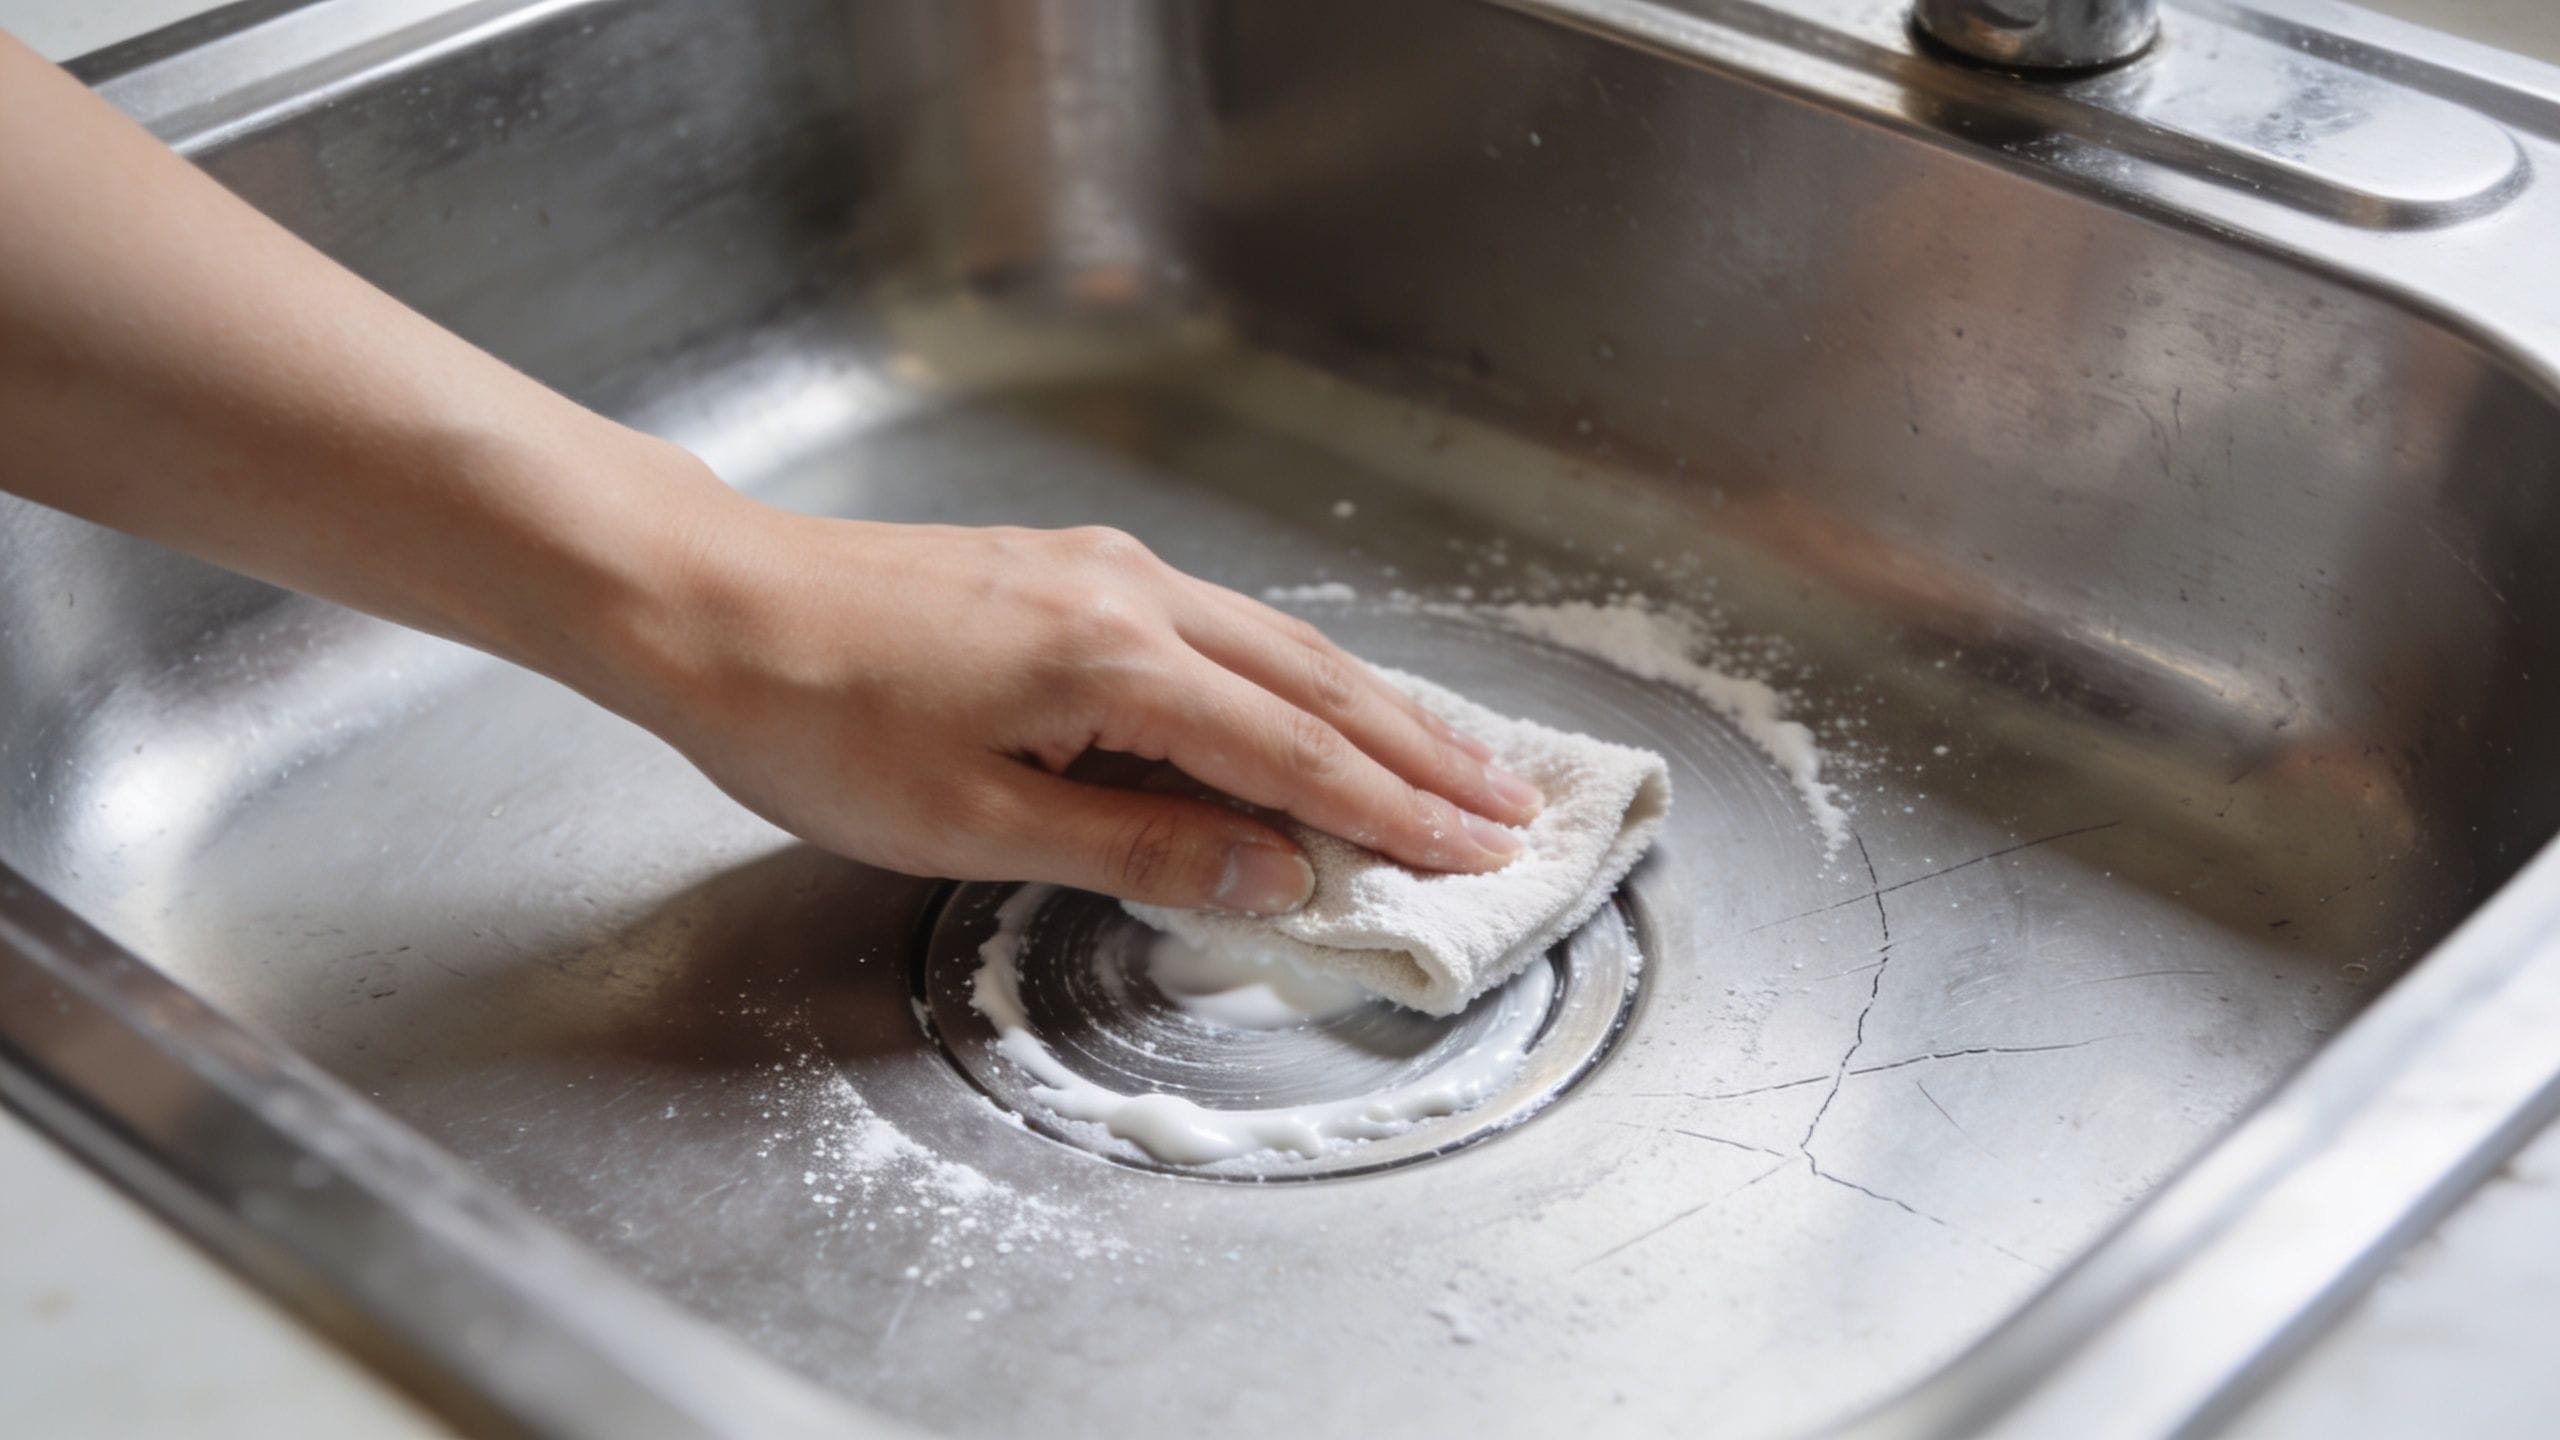
How to use a baking soda paste correctly
Mix baking soda with a little water until it forms a soft paste. It should spread easily and stay where you put it.
Then work in this order:
- Wash the area first: Clear away grease, soap film, and any grit.
- Dry and inspect the sink: Residue and water haze can make a light scratch look deeper.
- Apply paste to the scratch: Use a microfiber cloth instead of a sponge.
- Rub with the grain for a few minutes: Keep the strokes straight, even, and light.
- Rinse well and dry fully: A dry surface shows the true result.
- Check the area under side light: Repeat once if the mark looks improved but still visible.
The pressure matters. So does patience. Fast, heavy scrubbing tends to dull the surrounding finish before it removes the scratch.
Circular rubbing is another common mistake. It feels natural, but it leaves cloudy swirls that show up fast in South Florida homes where strong window light hits the sink every morning.
The goal with a light scratch is to reduce how much it catches the eye and blend it back into the existing finish.
For high-use kitchens, I also recommend drying the sink after each heavy prep session or turnover clean. That habit helps with scratch visibility because hard water spots and humidity leave a film that highlights every line in the steel. The same gentle-tool approach helps elsewhere in the house too, especially on delicate surfaces and dusty fixtures. These fan cleaning tips from Sunset Shine Home Cleaning follow that same principle.
Some light scratches fade almost completely. Others remain faintly visible, which is normal. On a brushed stainless sink, a repair is successful when the mark blends into the grain instead of pulling your eye straight to it.
Repairing Medium to Deep Scratches Like a Pro
A scratch that catches your fingernail is a different job. At that point, powder cleansers and hand polishing usually won’t level the damage enough to matter. What works is controlled abrasion, matched to the sink’s grain, with enough patience to avoid leaving a brighter, flatter patch around the repair.
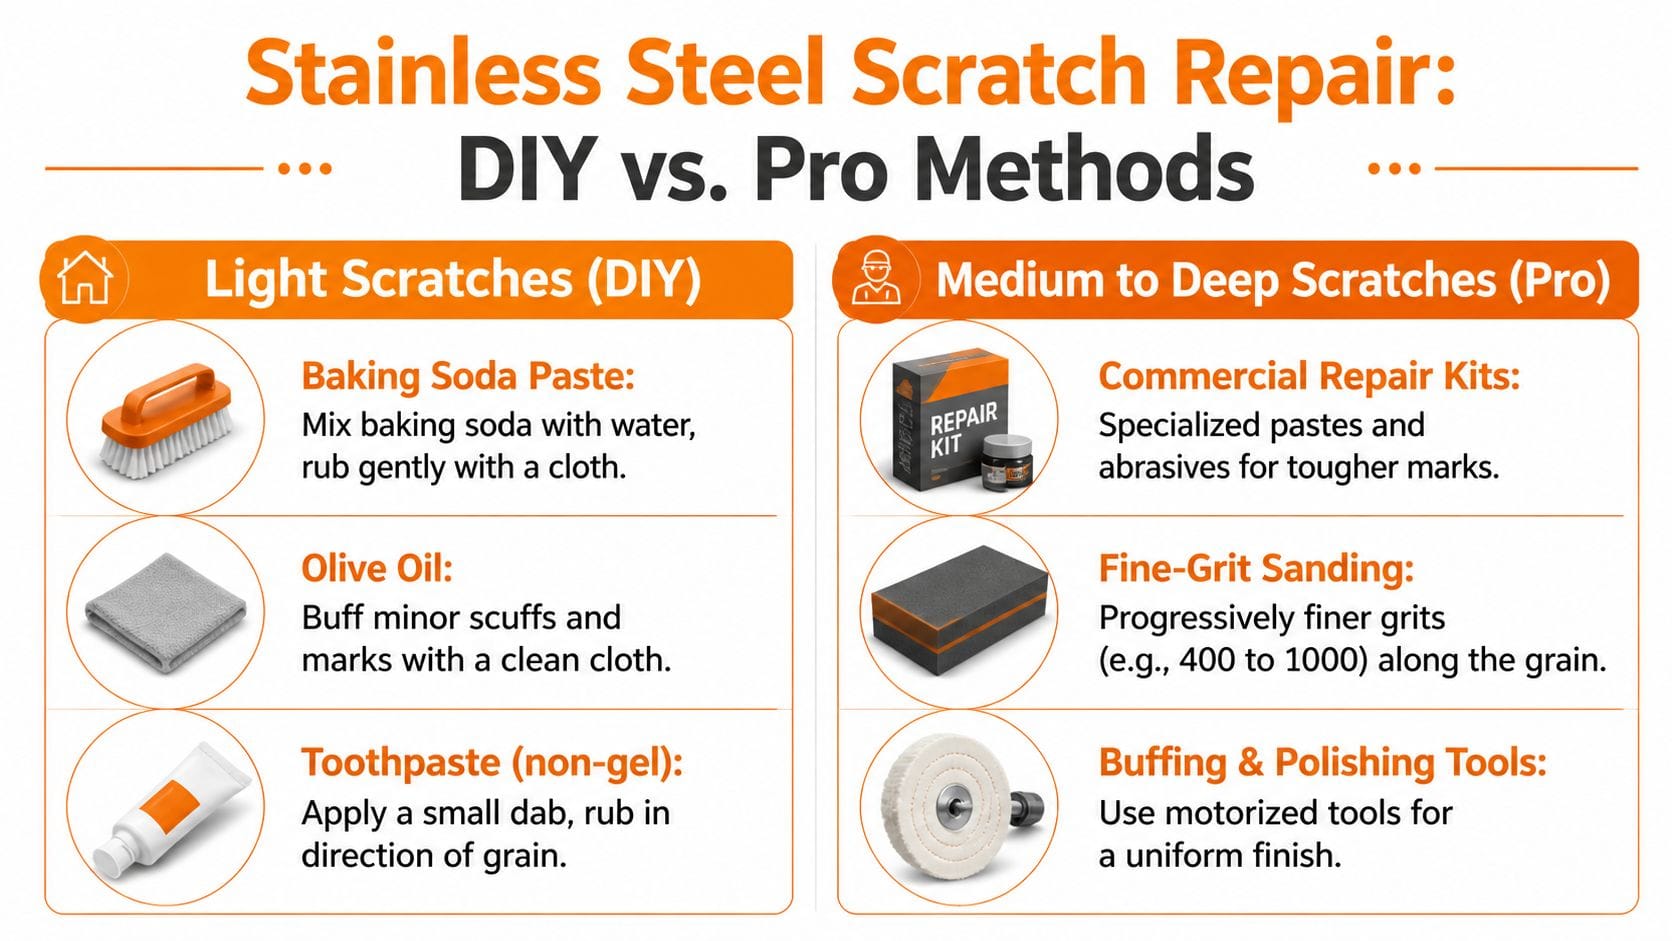
For deeper damage, JYT Steel’s sink scratch repair guide describes using a stainless repair kit with progressively finer abrasives and wet sanding along the grain. That approach can improve deep scratches, but only if you stop treating the sink like a wood project and work it like finished metal.
South Florida homes add one more wrinkle. Hard water film and humidity make repaired areas harder to judge in real time. I see this in West Palm Beach kitchens all the time, especially in vacation rentals and listing cleanups where the sink gets heavy use and bright window light hits the basin. A repair can be going well and still look blotchy until the surface is fully rinsed, dried, and viewed under clean side light.
When sanding makes sense
Use a repair kit when the scratch sits below the surrounding finish and stays visible after the light-scratch methods. If the line is shallow but wide, start finer than you think. If it is narrow and clearly gouged, you may need a coarser starting point.
The trade-off is simple. Starting too coarse removes extra finish you can’t put back. Starting too fine wastes time and tempts people to press harder, which causes its own damage.
Skip random garage sandpaper. Use a kit meant for stainless steel so the grit progression is clear and the finish is easier to blend.
How to repair the scratch without creating a dull spot
Clean the sink first and remove any grease or mineral film. If the basin has hard water buildup, deal with that before sanding so you are working on metal, not residue. Then wet the area and keep it wet through the repair.
Work like this:
- Choose the least aggressive grit that can reach the scratch. Medium scratches usually need a finer start than deep gouges.
- Sand only with the grain. Straight, short passes give you more control than long strokes.
- Widen the repair area gradually. Blend beyond the scratch so you do not carve a narrow channel into the basin.
- Wipe, inspect, and adjust. If the scratch is fading but the finish is turning cloudy, move up to the next finer grit.
- Progress through the full sequence in your kit. Each step should remove the pattern from the grit before it.
Pressure stays light the whole time.
That is the part homeowners rush, especially in high-turnover Palm Beach County properties where someone wants the sink photo-ready fast. Rushing usually leaves a repair that looks fine wet and obvious once the sink dries.
A practical way to judge the repair
Use this quick guide before you commit to more sanding:
| Scratch depth | Better approach | Biggest risk |
|---|---|---|
| Medium | Fine wet sanding and controlled blending | Removing too much of the surrounding finish |
| Deep | Full repair kit with progressive grits | Leaving a flat, dull patch that reflects light differently |
| Wide, distorted, or multi-directional damage | Professional refinishing or sink replacement evaluation | Chasing the scratch until the whole area looks uneven |
On brushed stainless, success means the scratch stops pulling your eye. It does not always mean the line disappears completely.
If you handle home projects yourself, take the same slow approach used in other DIY cleaning guides for delicate household surfaces. Stainless steel rewards control. In Florida kitchens with mineral-heavy water, that control matters even more because any uneven finish gets highlighted the minute water spots dry on top of it.
The Final Polish and Blending Your Repair
Getting the scratch down is only half the job. If the repaired spot doesn’t match the rest of the sink, your eye will still go straight to it. The final polish is what turns a repair into a finish that looks intentional.
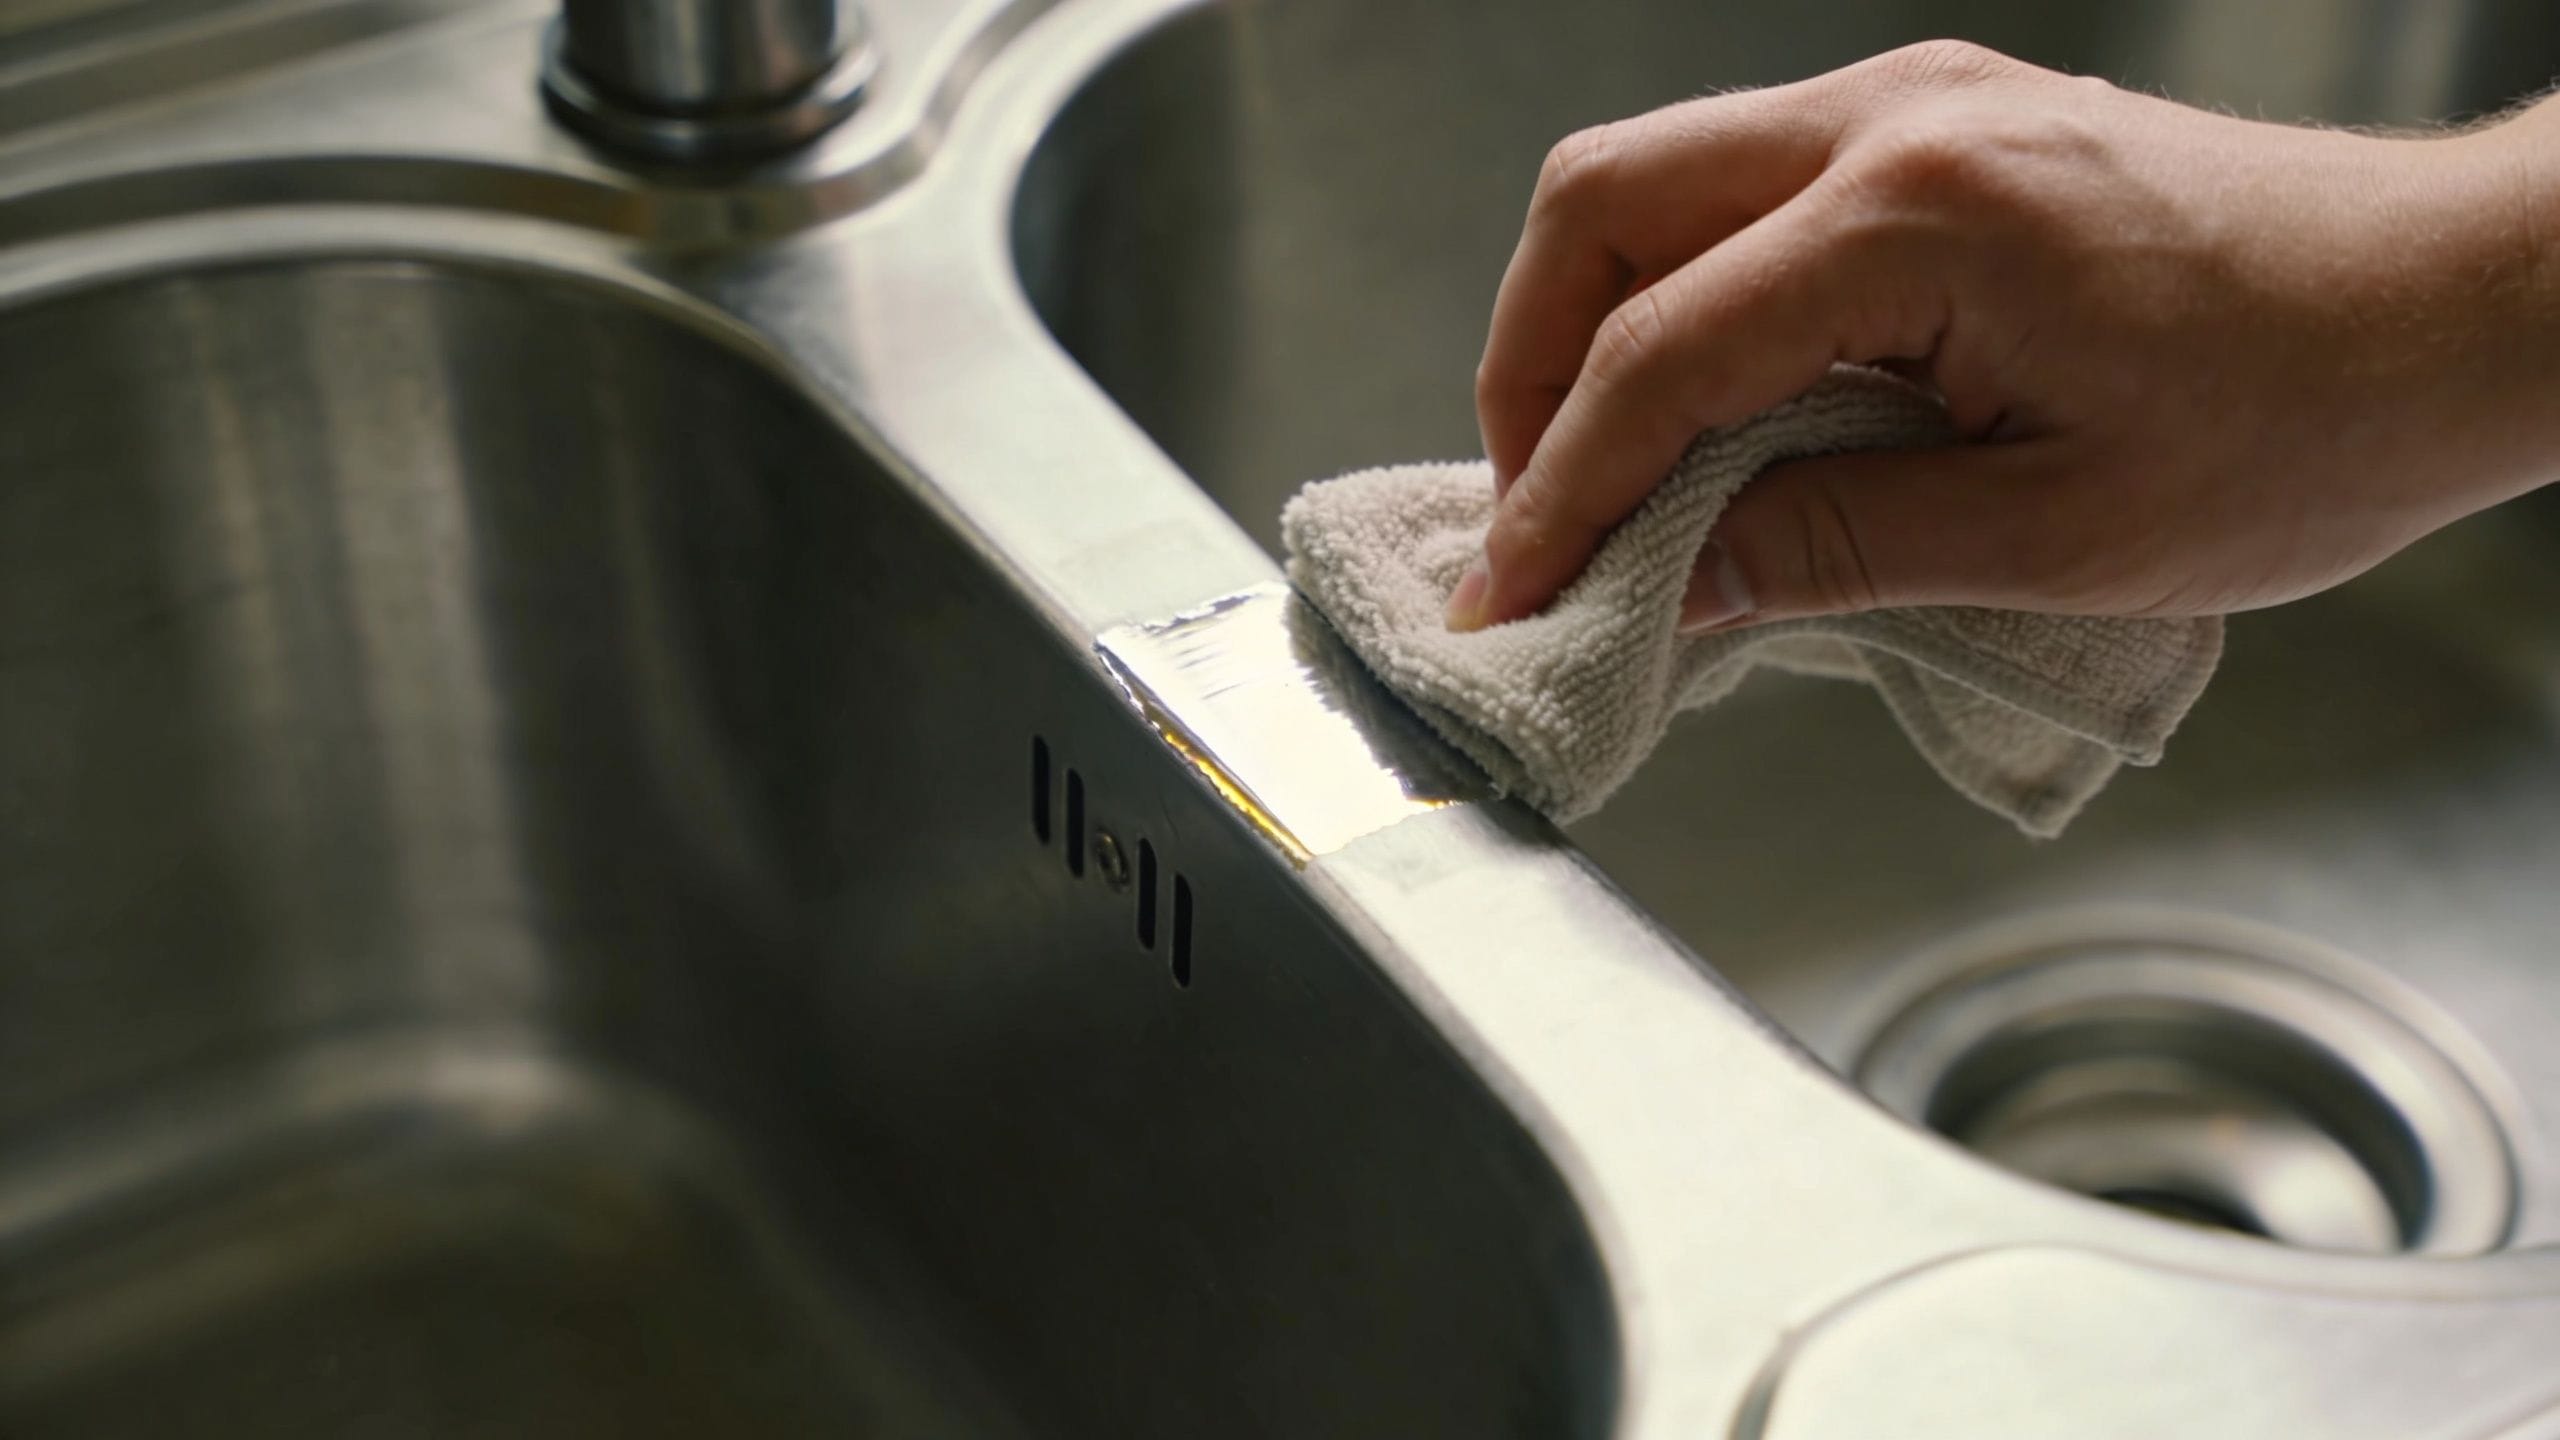
Blend the repaired spot into the whole sink
After sanding or spot treatment, don’t focus only on the scratch area. Wipe down the entire basin and lightly polish a broader section around the repair. That wider blending pass helps the finish look even instead of patched.
For medium scratches, many pros finish with a fine polish and then buff with a soft cloth. For repairs that involved sanding, this step matters even more because the surrounding steel needs to visually catch up with the corrected area.
Use straight strokes with the grain and keep your pressure consistent. Fast buffing in random directions can put a swirl into the surface.
What to use for the final finish
Two common choices are a stainless steel polish or a small amount of olive oil on a clean cloth. In the verified data, olive oil buffing is described as helping restore luster after sanding and filling micro-pores, while also helping with water spotting. In a humid West Palm Beach kitchen, that extra smoothing effect helps because moisture and mineral residue tend to highlight uneven areas.
A good finishing routine looks like this:
- Dry first: Polish goes on a dry sink, not a damp one.
- Use a small amount: Too much product leaves residue and streaks.
- Buff beyond the repair: Feather the shine into the full sink bottom and lower walls.
- Finish with a clean cloth: Remove excess so the sink feels smooth, not greasy.
A polished sink shouldn’t look slick. It should look even.
If your repair is still visible after polishing, that doesn’t always mean you failed. It may mean the scratch was deeper than expected. If it’s significantly softer, less reflective, and no longer the first thing you notice, the repair did its job.
A Proactive Maintenance Plan for a Scratch-Free Sink
The cheapest scratch repair is the one you never have to do. That matters even more in Palm Beach County homes where humidity and mineral-heavy water can make every flaw look sharper. For vacation rentals, listing photos, and move-in or move-out prep, a worn sink can subtly drag down the whole kitchen.
The gap in most sink advice is prevention. The Ruvati care page highlights that preventive care frequency and professional maintenance schedules are underserved, especially for high-use properties like vacation rentals and move-in/move-out scenarios where cleaning frequency affects long-term wear.
Why prevention matters more in Palm Beach County
A sink in a lightly used condo ages differently than a sink in a busy family home or short-term rental. The rental sink gets cookware dropped in it, rushed wipe-downs, stronger cleaners, and more turnover. The result isn’t just more dirt. It’s more opportunities for abrasion.
That’s why a maintenance plan should focus on habits, not miracle products.
The habits that protect stainless steel best are simple:
- Use soft cloths and non-abrasive sponges: They clean without adding a new layer of fine scratching.
- Rinse grit before wiping: Sand-like food debris dragged under a sponge is a common culprit.
- Dry after cleaning: Water spots and mineral film make old scratches stand out more.
- Avoid sink-side storage of heavy metal items: Repeated contact around the basin edges leaves wear fast.
A practical routine for busy homes and rentals
For an owner-occupied home, stick to gentle daily wipe-downs and periodic deeper attention before residue builds up. For short-term rentals, listings, and turnover properties, schedule professional cleaning often enough that staff or guests never need to attack buildup with harsh tools.
That’s a key return on maintenance. It preserves the finish and reduces the urge for aggressive cleanup later. The same mindset applies to surrounding trim and high-touch surfaces too. If you’re keeping a property guest-ready, these baseboard cleaning tips from Sunset Shine Home Cleaning fit well into the same prevention-first approach.
A sink doesn’t need to stay factory-new to look good. It needs to stay evenly cared for. In South Florida, consistency beats occasional heavy scrubbing every time.
Frequently Asked Questions About Sink Care
Can I use steel wool or abrasive pads
It’s a bad idea for most sinks. Even if you’re trying to fix one scratch, rough tools can leave a wider patch of smaller scratches around it. If you need abrasion, use a method meant for stainless steel and keep it controlled.
Do brushed and mirror finishes need different treatment
Yes. A brushed finish is more forgiving because you can blend with the visible grain. A mirror finish shows every mistake, so even light correction has to be gentler and more precise. If you’re not sure what finish you have, start with the least aggressive method.
Are rust spots and scratches the same thing
No. A scratch is physical damage to the finish. A rust-colored spot may be surface contamination, mineral staining, or corrosion around damaged metal. Clean and inspect before deciding what you’re dealing with, because the fix is different.
If the mark changes after cleaning and drying, it wasn’t just a scratch.
When should I stop and call for help
Stop if the scratch is wide, deep, or spreading into a distorted-looking patch from your repair attempt. Also stop if the sink has a finish you can’t easily match, or if it’s in a high-visibility kitchen where an uneven repair will bother you more than the original scratch did.
Can I use vinegar every day
Use caution. Vinegar can be part of maintenance, but it shouldn’t replace gentle routine cleaning with soft cloths and proper drying. If you use it, rinse thoroughly and don’t let acidic cleaners sit on the surface longer than needed.
Why do scratches look worse in Florida homes
Light, humidity, and hard water residue all play a role. In bright kitchens around West Palm Beach and nearby coastal areas, reflective stainless steel makes surface flaws easier to see. Mineral film also outlines scratches and dull spots, which is why a sink often looks more damaged before it’s properly cleaned than after.
If your kitchen or rental property in West Palm Beach needs more than a quick touch-up, Sunset Shine Home Cleaning helps homeowners, landlords, Airbnb hosts, and busy families keep sinks, counters, and high-touch areas clean with the right tools and non-toxic products. Whether you need a one-time deep clean or recurring service that protects the finish of your kitchen over time, their local team makes it easier to keep the whole space looking polished.